I fell into a rabbit hole – again – building a scale model. This happens almost every time but this time it seemed deeper than usual. Was it because of me having an exceptionally good time? Or bad? Am I getting old and just slow? I really don’t know.
With these plunges comes a problem. I have trouble focusing on anything else while building. For someone earning a living as a freelancer this is not a good thing. And yes, now that the model is finished I need to find some paid work. I spent way too much time with this.
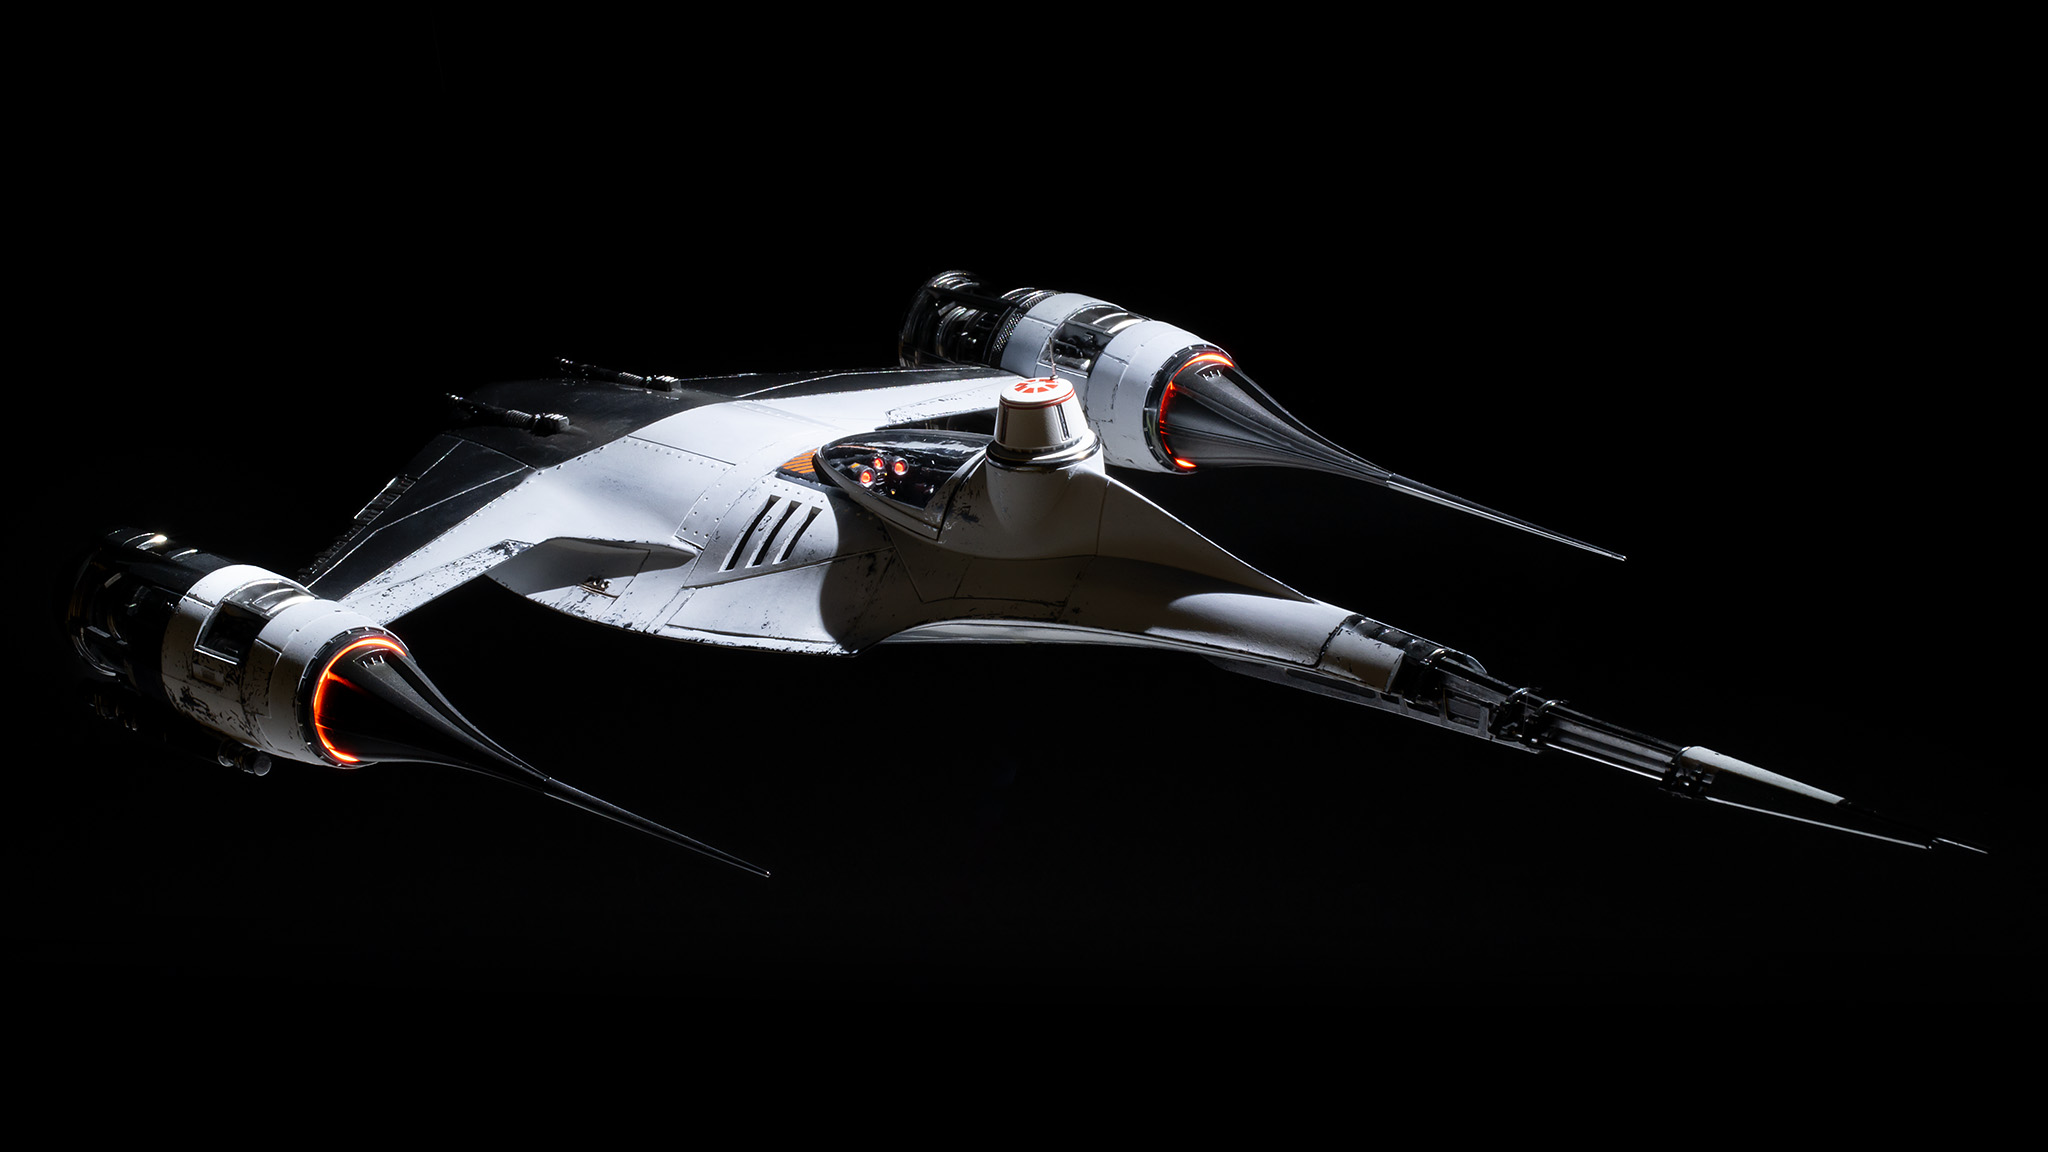
Anyway, I would like to say this Mandalorian N-1 starfighter model is very cool! It is from Revell Germany and at 1/24 scale it is properly big. Finally, a Star Wars plastic injection kit model big enough to my preferences! I made changes to it so it is not like the one you saw in The Mandalorian tv-show. It is not like the one in The Phantom Menace either. It’s a custom, a remake of a small white AMT model I built a couple of years ago, it is the “Royal Guardsman Mark 2”, if you will.
The original white Royal Guardsman N-1 starfighter from 2022. Made from the small and quite simple AMT 1/48 scale model kit.
The cause of the deeper than usual rabbit hole was my ambition. I wanted to try something despite having failed at it earlier. The idea of using a metallic basecoat and painting colour on top is perhaps not ideal but I wanted to try it. It’s because of the effect I thought could be achieved by it. It’s about the top layer of paint peeling off due to friction or stress revealing metallic materials under it. This is a spaceship after all.
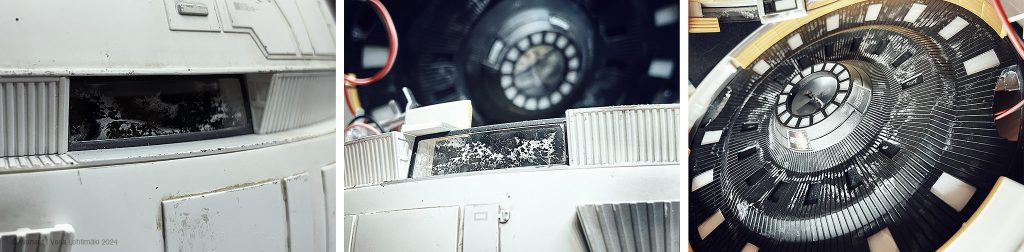
The build itself was great fun but the ambitious paint design hit a snag. Here is some of the hardest part of the build process photographed from top.
From left, first attempt to paint the model was a failure. I removed the white with water (as it was painted on a water soluble chipping medium), then I painted it white again. It didn't look good so I removed everything with acetone. New white but it was, again, wrong. Another wipe with acetone and finally, on the right, metallic base before the final white layer – a success this time.
This all took a long time because every layer of paint had to dry for a couple of days. First basecoat, then gloss black, metal on top of that and then white. I was not able to do much else while waiting. The immersion building these is very deep! For me, at least.
In the meanwhile I tinkered with assorted details around the model. Installing lights here and there.
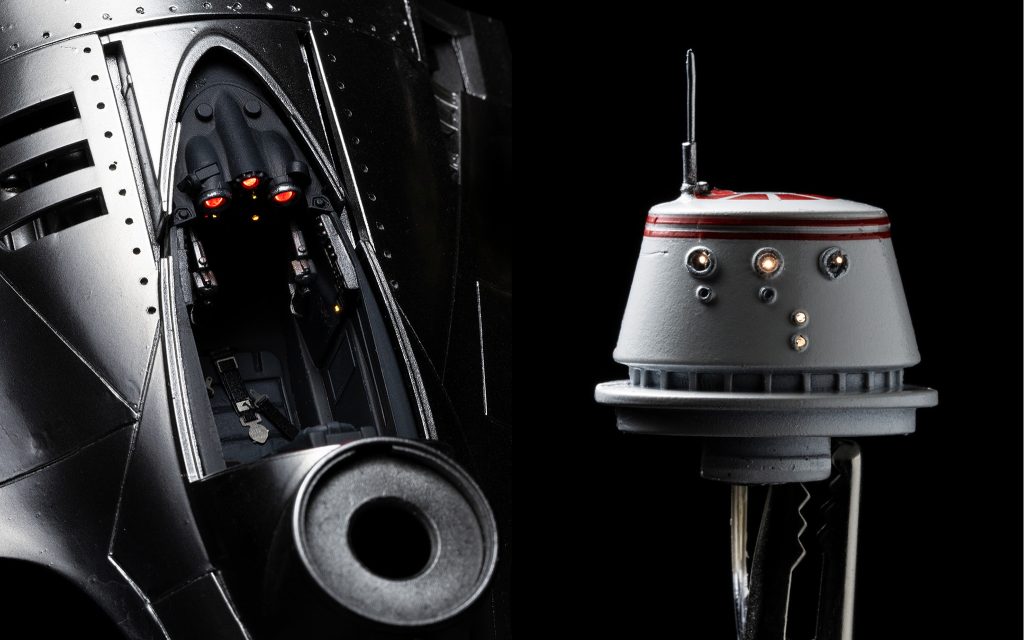
The big 1/24 scale allows more detail. I made the best of it and tried to install lights, the bare necessities, like the droid head and dashboard gauges. That is 0,25 millimeter optic fiber in the droid head. Only twice as thick as human hair. For the dashboard I chose red because it just looks better than blue on digital camera sensor. The wavelength of blue leds act weird on camera. The seat belts are from a Mercedes Benz upgrade sheet I bought from a local hobby store.
In the end everything worked quite well and I am very happy with the final version. I think this willl perform well in photographs once I get there.
I have never built a model twice. Once a model is finished I don’t want to see it for a while. You know? There has to be some distance before I can think of photographing it. But with this one I don’t feel that need and I’m thinking of building another one. Some day.
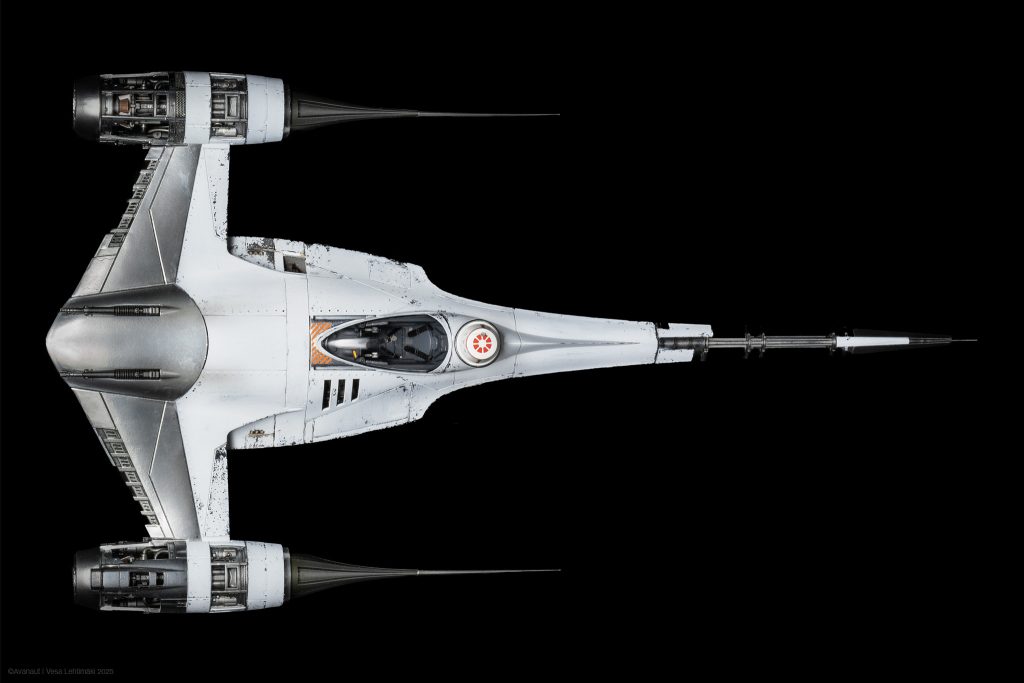
The finished model, top view. Not much added weathering after the paintjob. A couple of decals but not much more. But to dig in deeper, that orange diagonal stripe decal in front of the canopy is actually from the same Microscale Rio grande decal sheet they used for the first X-wing model ever made in 1976, the one known as Blue 1. Same location too, in front of the canopy. The blue markings were painted red (Red 2) for filming and the blue X-wing was never seen on screen in the blue livery. Microscale still produces the same decal sheet and I happened to have one left over from earlier modelmaking projects. This was a nice hommage to the first X-wing I think.
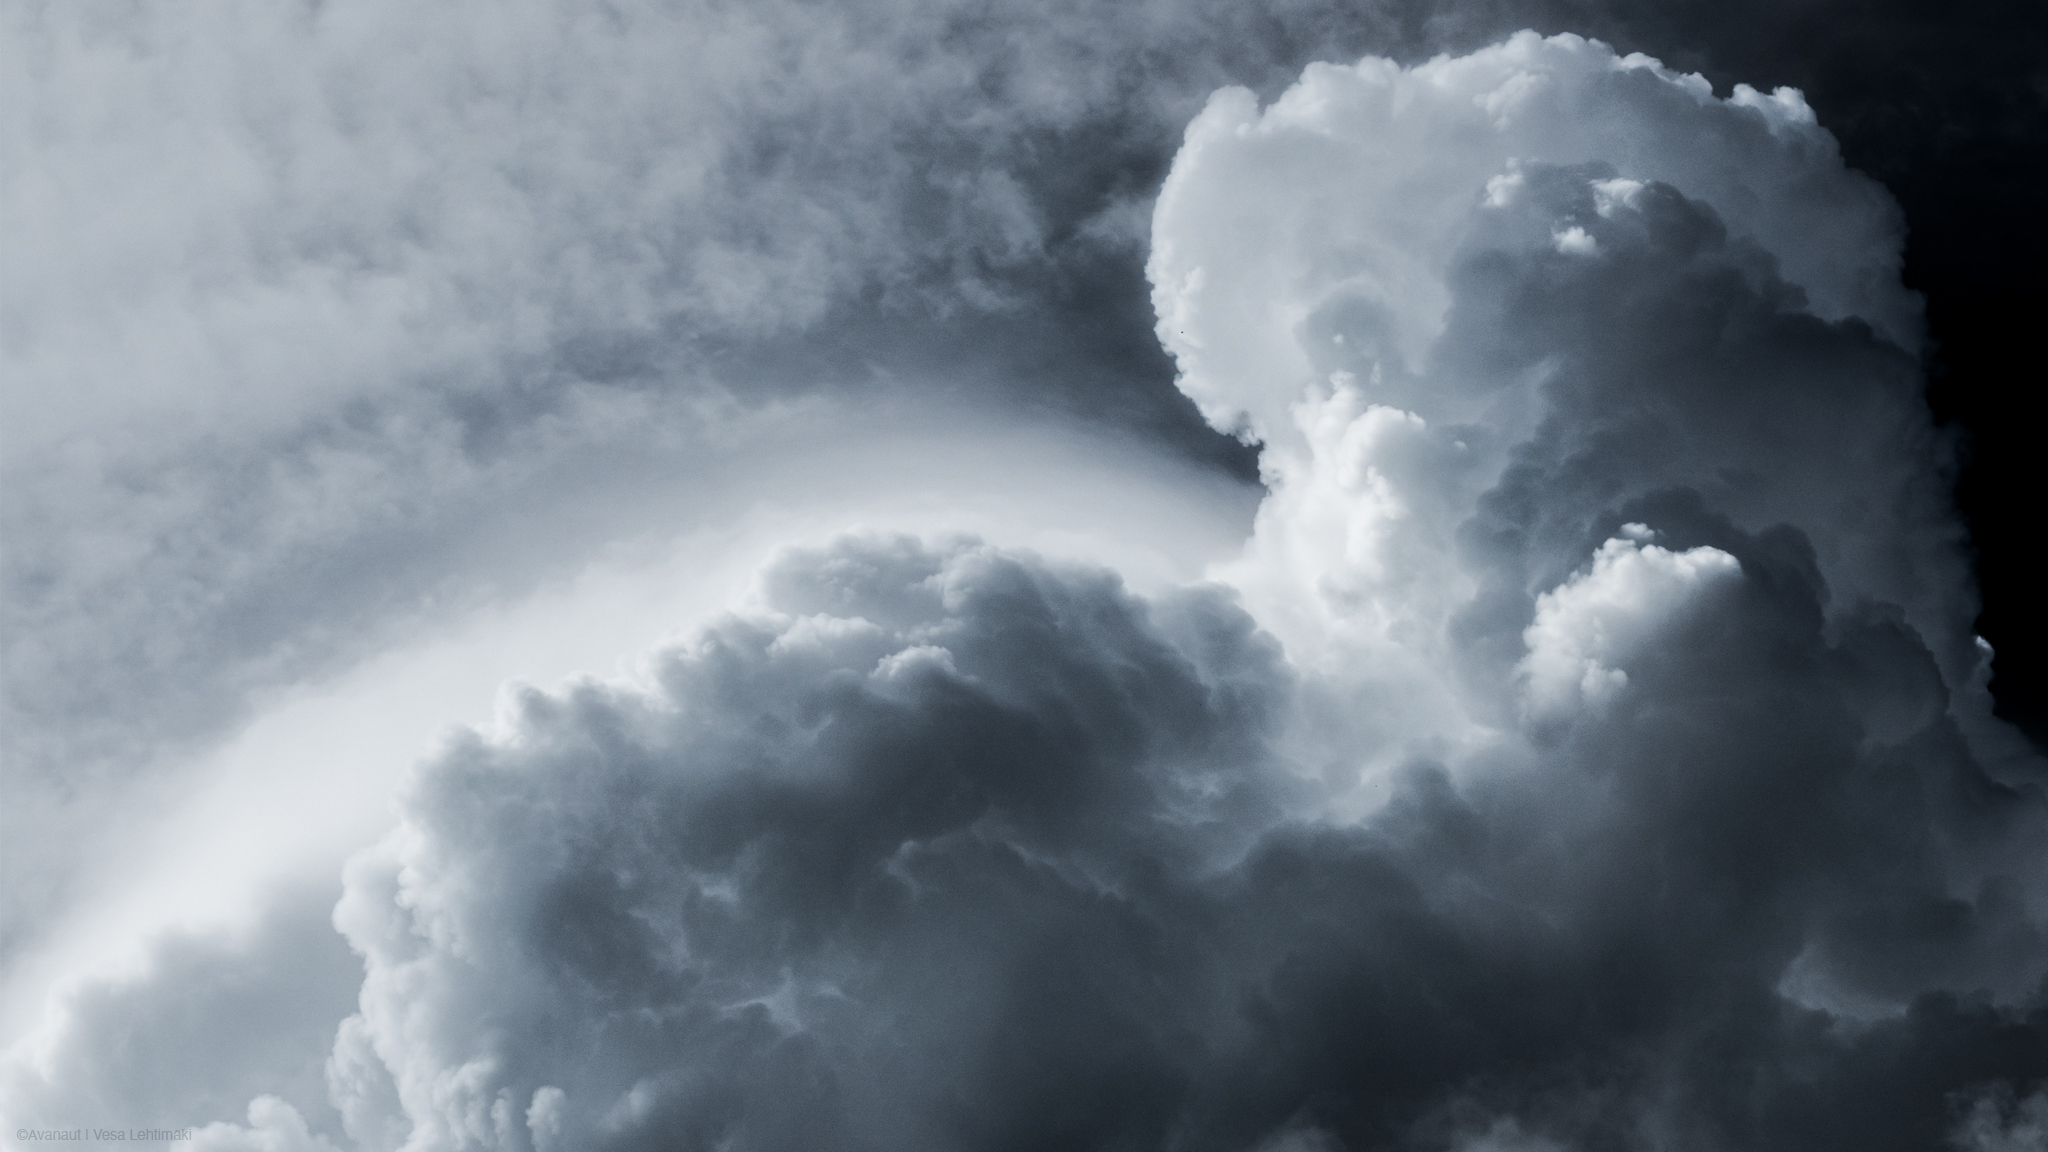
I photograph clouds from time to time. Not thinking of spaceships or anything of the sort, only the clouds. Just stopping somewhere for a moment to look at the sky can be mesmerizing. Especially if standing on the shore by the sea with the horizon in sight. With clouds every second is unique. If you look away for a moment a beautiful cloud is gone or maybe something interesting comes up where there was nothing.
I don’t go cloudwatching all the time, just sometimes. I try to have no goals or pressure, merely moments of calm. This happens mostly in the summer because our winter is too cold for those beautiful big Cumulonimbus clouds.
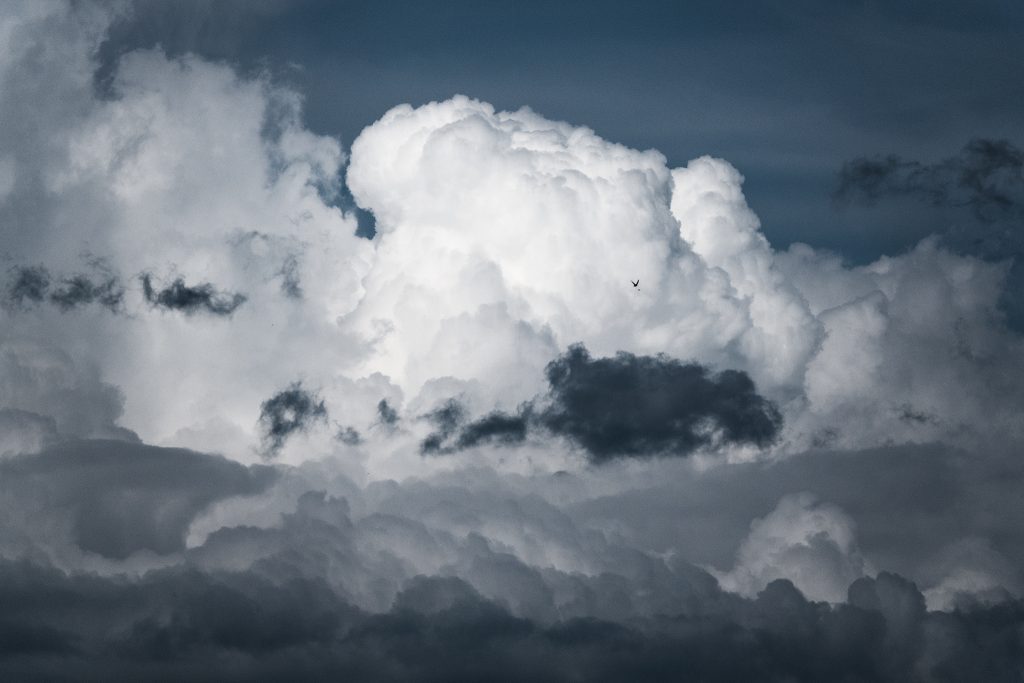
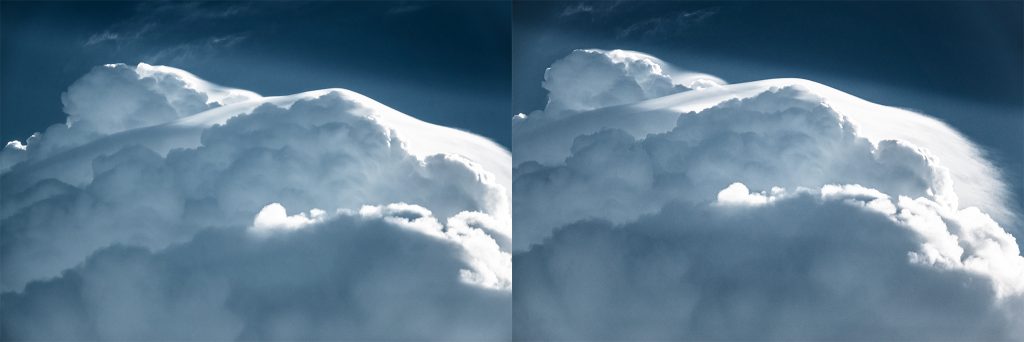
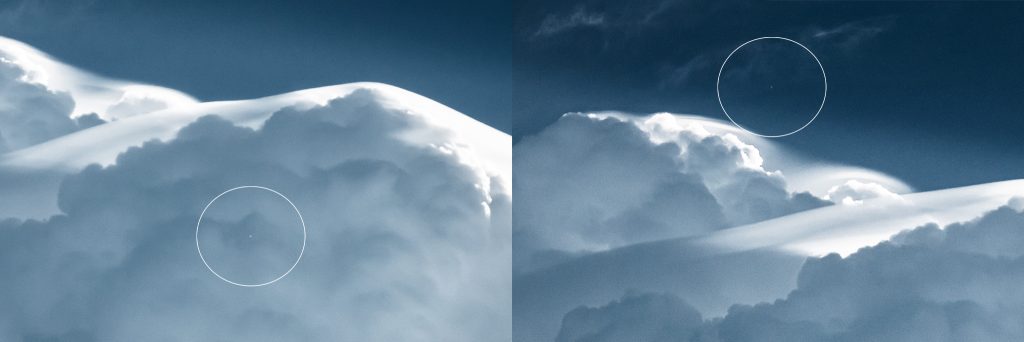
Simple clouds. The bonus in how you often find birds flying in high altitudes. Swallows usually. You don’t necessarily even see them when photographing, zooming in reveals them.Cirrus clouds can be quite pretty too.Closeups of a rising Cumulonimbus cap forming. Sometimes it is not so easy to check the tiny dots among the clouds off as birds. Birds make a darker than cloud silhouettes, when it’s white it is likely something else. Sometimes I see these tiny white dots. Definitely not birds. They were an intriguing mystery until last year when it turned out there is a weather balloon station north of where I live. The white dots are just their research balloons. Not that I ever thought they were anything out of this world.
Yup, clouds are nice.
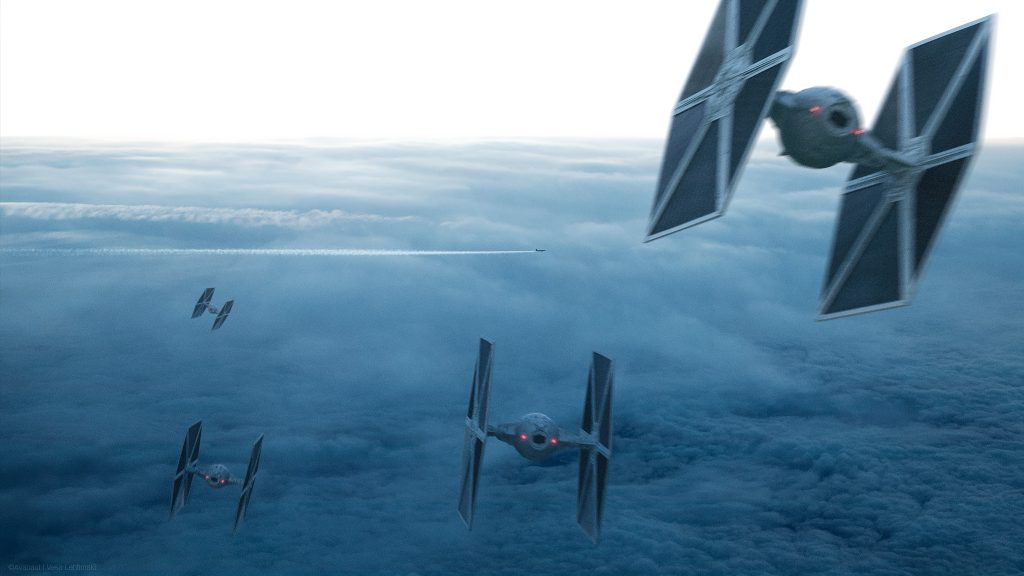
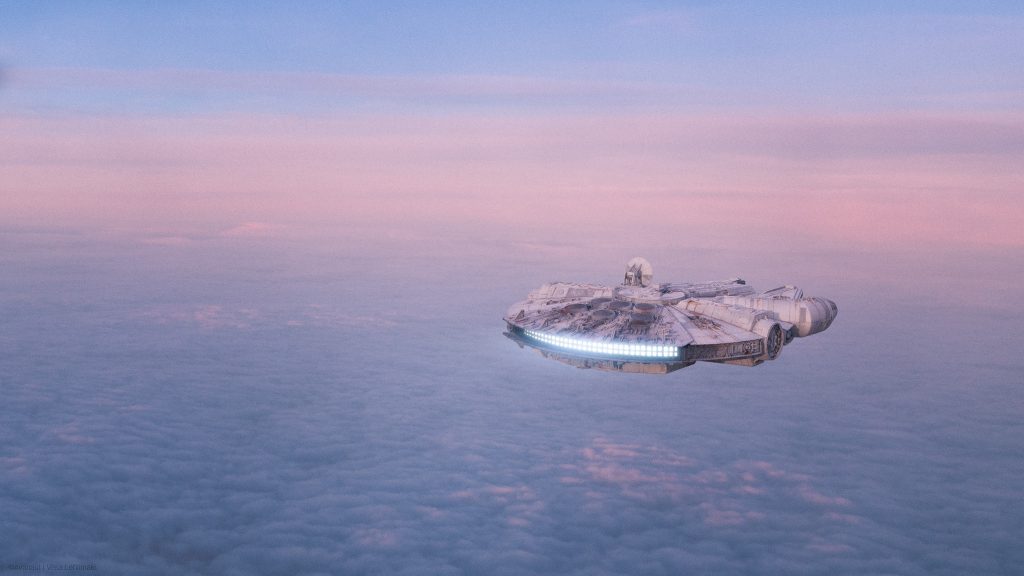
Due to the huge size of a cloud a small spaceship can’t really touch it. There is no contact surface because a cloud is not very sharp on the edges looking at it next to a spaceship just a few metres long. Therefore my rules of interaction don’t apply. I have rules, you see. One of them is that the model must have some kind of interaction with its surroundings, a shadow or a reflection from a light source for example. Anything to tie them together. With clouds this rule does not work. Unless it’s a really big spaceship maybe, a Star Destroyer or something like that. To make this thing work with my small ships I have to simply work with light, contrast and colour.
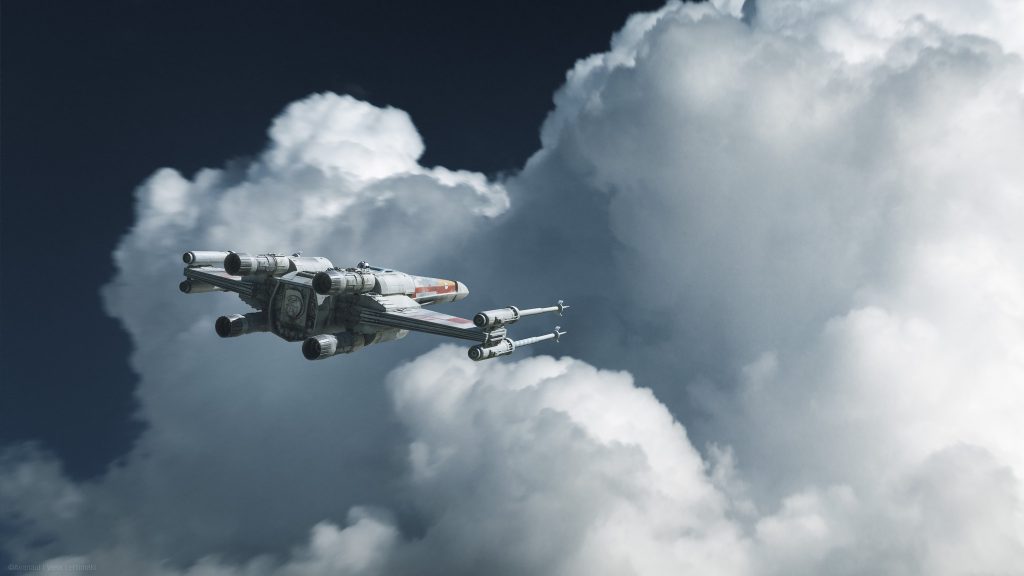
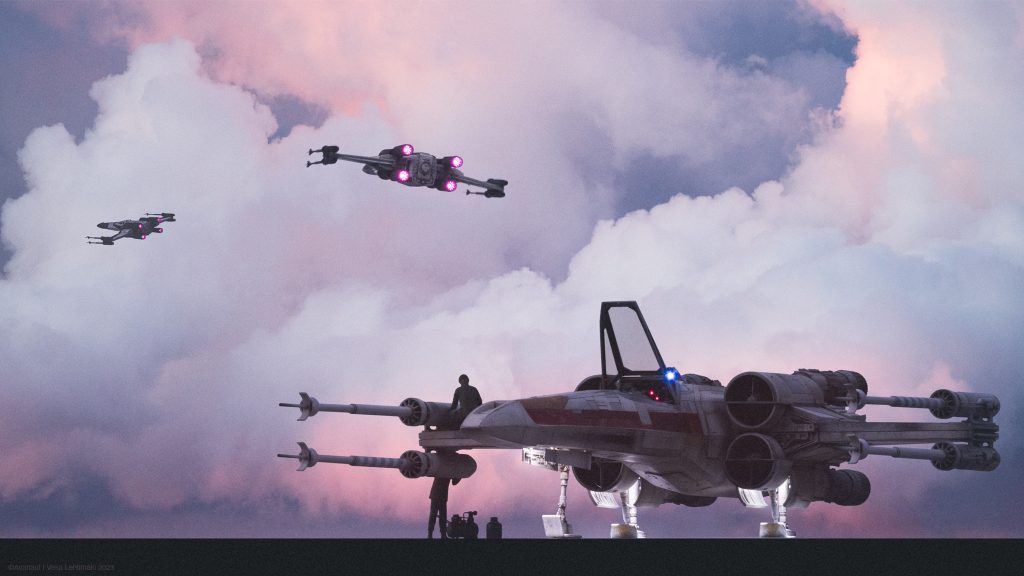
Watch the Skies, 2020. Clouds from the window of an aeroplane a few years earlier. I wish I had more of these but when I still used to fly I never had a good camera for taking images like this with me. This was taken with my old Canon PowerShot G16 point-and-shooter. It was a fairly good camera when the circumstances were right. In low light the image quality dropped fast. But if the grain can be part of the look, then why not make the best of it.Over the Clouds, 2018. Enough light for the old Canon PowerShot to capture at least some detail from the calm clouds illuminated by the rising sun. This was somewhere over Greenland I think. I was flying home from Seattle in 2015 and had a window seat.A triptych of vertical cloud images from 2020-2022. Various experiments with clouds from the archives. These were probably all photographed simply from our back yard.Heavens Above, 2020. That X-wing model has no engine lights as it is fixed with the landing gear down. I edited the landing gear out for this but didn’t want to fake the engine lights. There is a nice calm gliding feel to it without them. Smooth, you can almost hear the engine almost at idle speed.The fixed landing gear of the big X-wing doesn’t prevent all cloud works. The big 1:24 scale model in front and the old 1:43-ish scale MPC X-wing duplicated in the background. The oldie is painted in the Rogue One partisan scheme and engines are with real lights in them. No engine light forgery there.
The header photograph is just a cloud, a nice cloud, no birds. I figured it’d work on its own there.
I’ve never been to Japan. I would like to but I suspect I may never be able to. Sigh.
This hasn’t prevented me from admiring the sense of aestethics in the Japanese culture. Or what I see of it through the narrow window of literature, comics and movies. This picture is probably more distorted than I realise but it is what I have.
The Japanese toy manufacturer Bandai offers incredible quality when it comes to plastic injection model kits. It is unlike anything else out there. I’ve built some Bandai Star Wars models but I wanted to try something different. The Japanese Gundam thing looks great, mecha suits, not robots, as I found out. I wanted one.
I knew nothing about the various versions within the Gundam lore, never watched any of the tv-shows, also blissfully uninformed of the variations in the Bandai product line. There were many different scales and difficulty levels available. After some serious googling I ended up buying the Bandai Perfect Grade Gundam RX-78-2 mecha suit in 1:60 scale.
I’ve not built anything of this sort before and for a newbie the kit offered some surprises. Biggest surprise I guess were the sprues with parts that had molded in ball joints. I hadn’t seen anything like that before. It was rather exotic for such an old kit, or any kit for that matter, this model was originally released in 1998. How much more complex the latest version that goes by the “Unleashed” brand can even be? It looks insanely more detailed in photographs. I’m glad I didn’t buy that one. It would have been too overwhelming.
Painting this was very different to what I am used to, all the exterior parts had to be painted before assembly. Due to the precision of the parts, no paint must go on the internal structures, connecting pins and such. If you paint them the parts don’t fit anymore, the layer of paint ruins it. It’s THAT precise! This meant lots of tape masks. Organising all this part by part was not the most pleasant thing about this build.
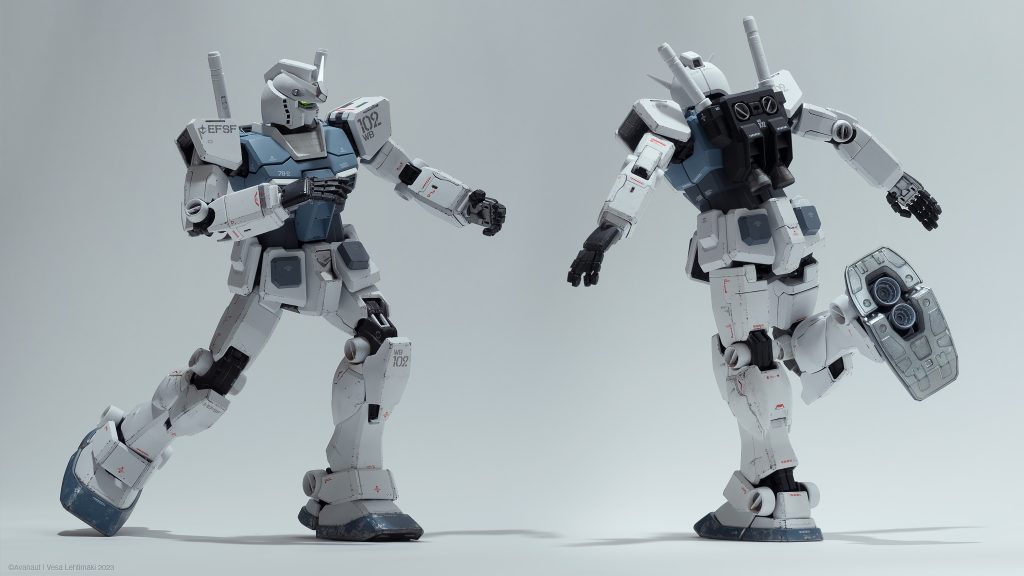
I wanted this to look different than the stock red/yellow/white so I painted it in white with two shades of blue. Cold, wintery colours, I suppose. The decals that came with the kit were stickers. I didn’t like them very much. So, I bought some waterslide decals online only to realise afterwards that they were for the Unleashed version, not this. I used them regardless and they are all over the place. The colours were wrong anyway so whatever. Wrong colours and details must be somewhat irritating thing to look at for those who actually know this stuff. Ignorance is bliss in my case.
First tabletop photographs of the just painted Gundam RX-78-2. This thing has an astonishing range of movement, fingers and all. And check out the lights in the eyes! I was prepared to hack this for lighting it but due to the complex structure it looked like a very difficult thing to pull off. But in the end I didn’t have to do it, this thing sported lights already, straight from the box!
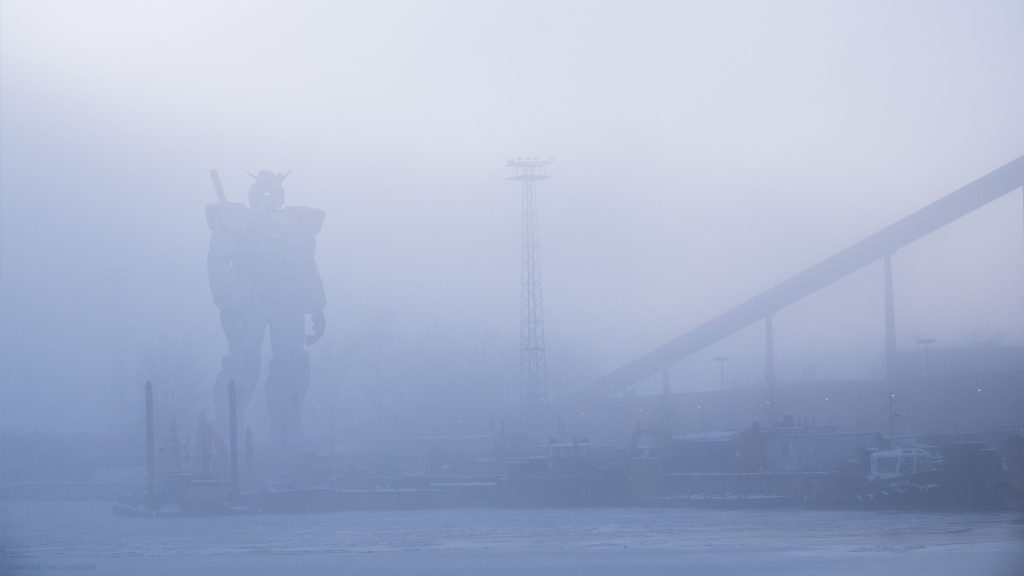
I have made a few photocomposites with the Gundam model to see how it is to work with. The following two were made with photographs I took on one beautiful foggy day in 2023.
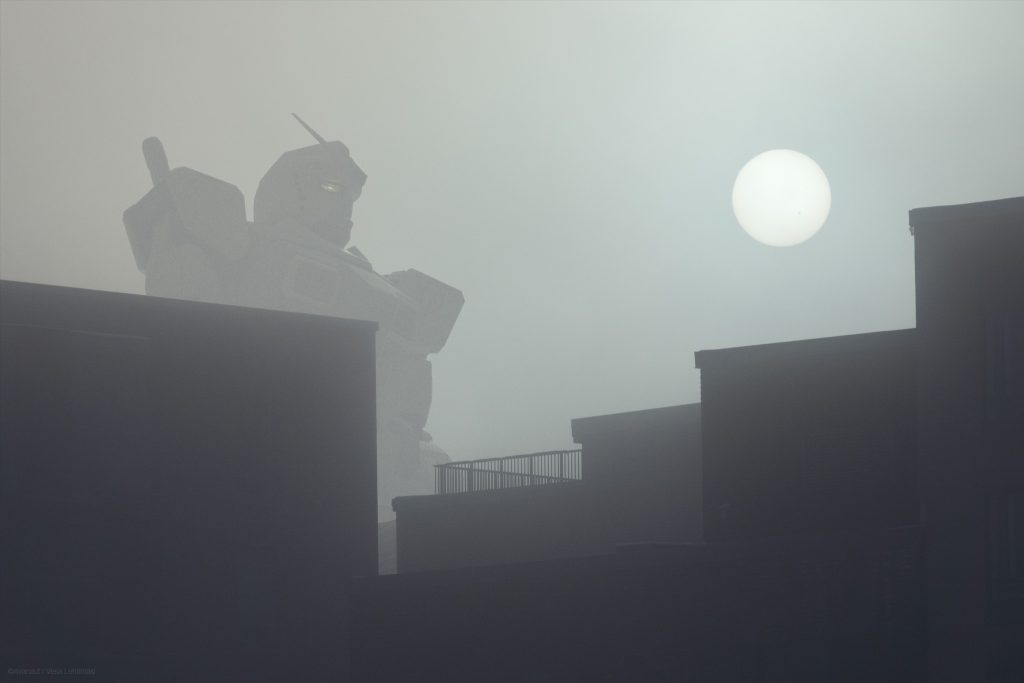
The Guardian, 2023. The fog, which is probably my favourite natural phenomena to photograph in, was amazing the day I took this. Everywhere I looked, just beautiful.The Sunspotter, 2023. The catch in this one are the spots on the sun. They are genuine sunspots. I figured they’d go well with the Gundam model.
Like with most of the models I’ve built there is an idea or two for a photograph when building them. Sometimes even before building. This one was no exception. But the photograph I had in mind with this one hasn’t really emerged yet. I’ve tried it but it has proven to be a bit of a challenge for me. Meanwhile I have continued experimenting with it, like the one with the church below.
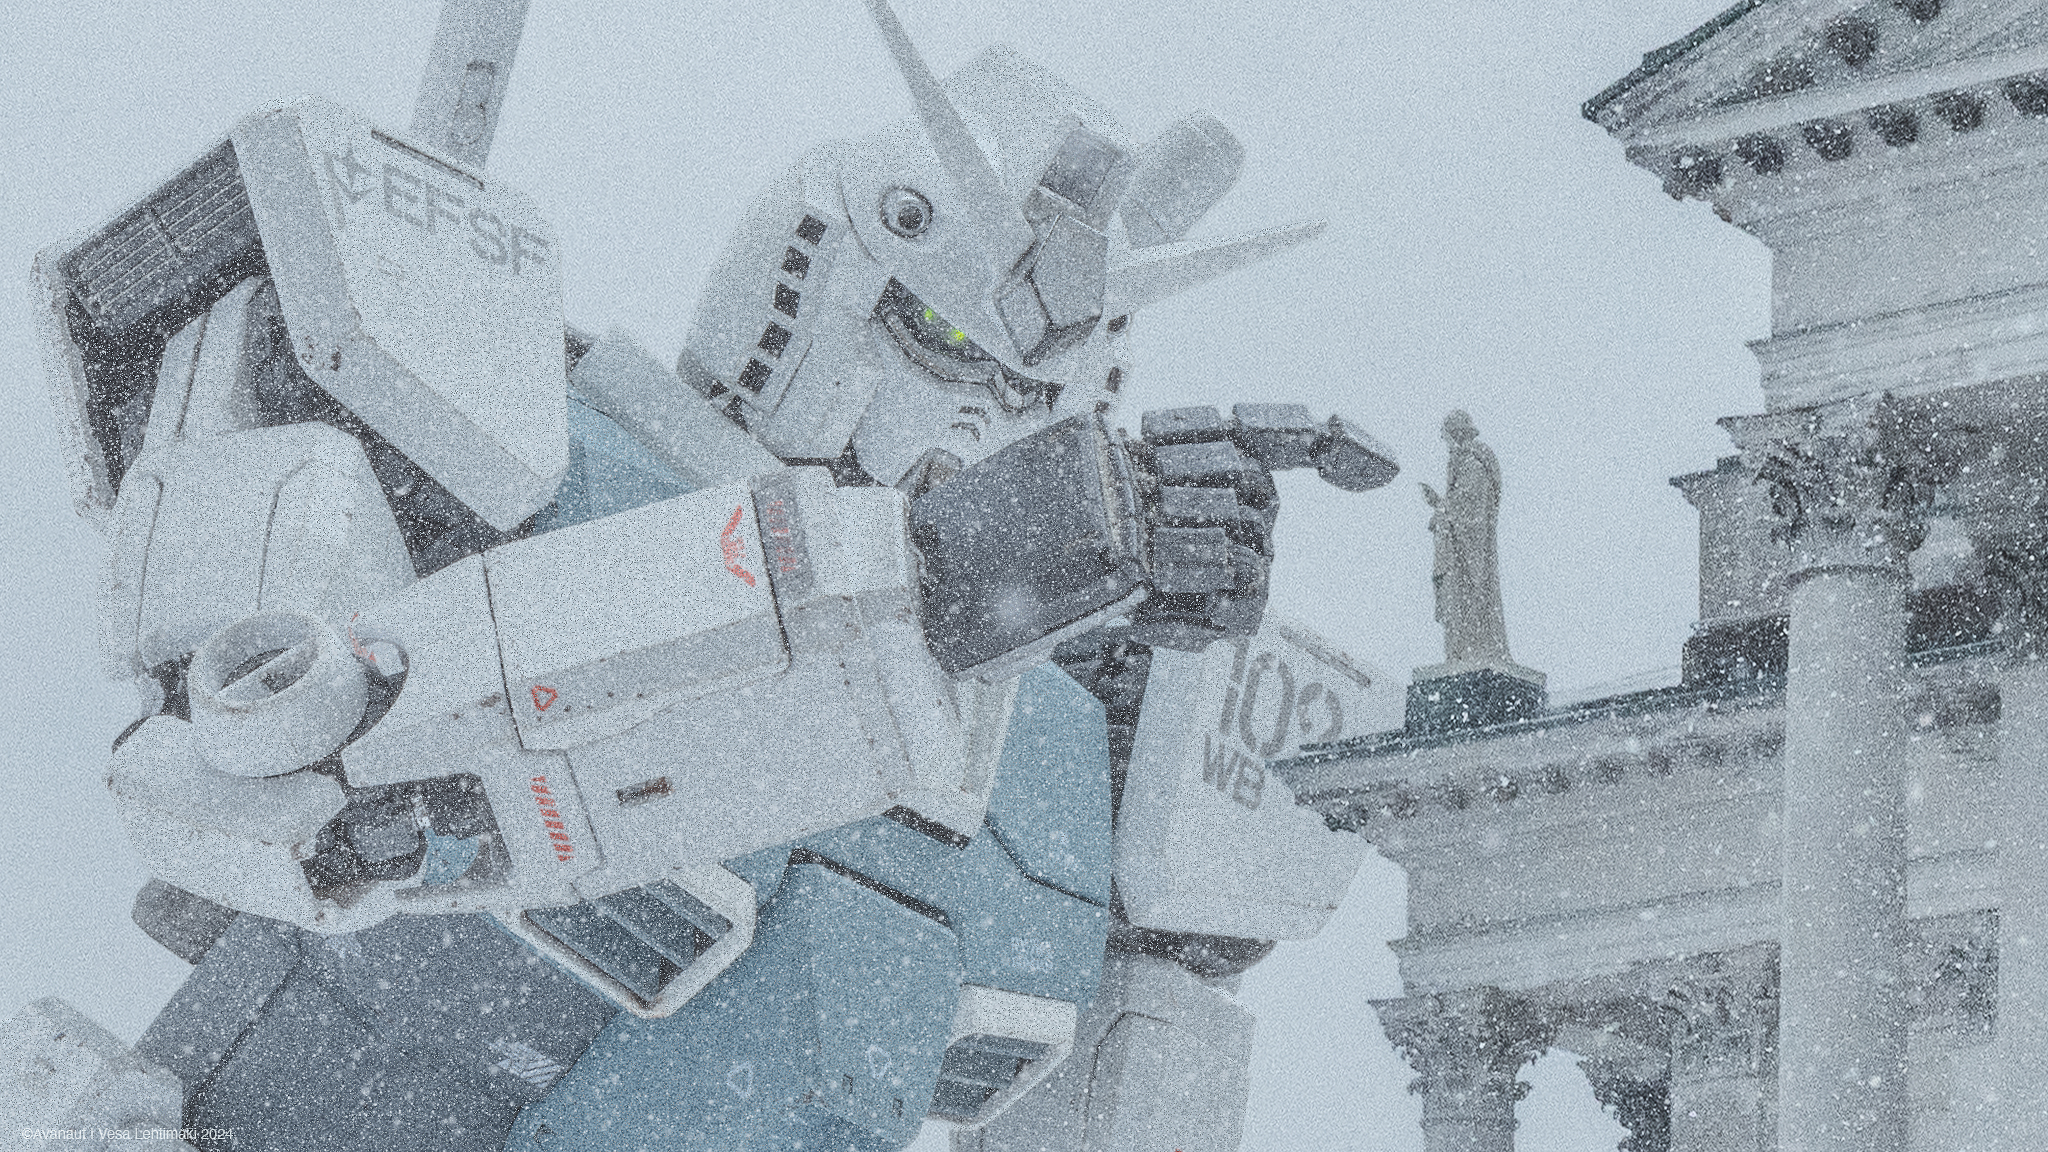
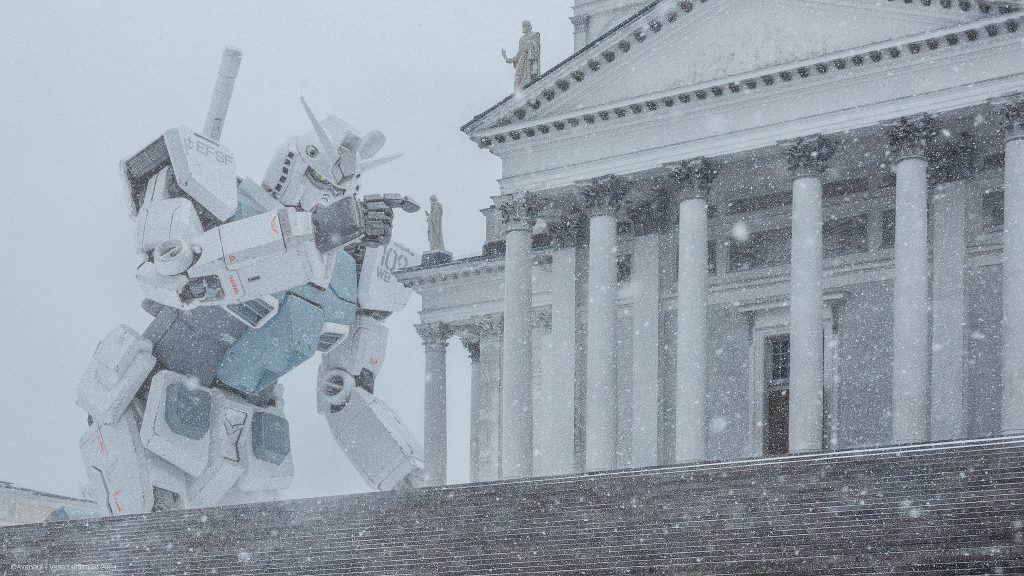
The Helsinki Cathedral and the RX-78-2 Gundam, in a beautiful blizzard, April 2024. I went there three times to try this. One time I locked myself out of my car while it was running with keys in the ignition and camera in the front seat. It took 45 minutes in the freezing blizzard for the locksmith to come and open the doors. It cost me 150€. What we do for art.
The white Helsinki Cathedral is a popular subject of photography, a tourist attraction. I didn’t quite get what I had in mind with the blizzard and light but it’s close. I’ll probably try again next winter.
From my early days of photographing Lego I have followed a guideline of not altering the photograph after I shoot it. I set this rule to me myself because otherwise I felt this would be more like a photoillustration thing than a photography project. Allowed was removing wires or supports, adjusting colours, contrasts and such, even cropping. The snow in my photographs doesn’t always flow quite like I’d like it to and I have used patches from other exposures to fix that at times. But this is the extreme. I have always avoided any altering of the image in a way that could be considered constructing it as it was a puzzle. That is to say, the subjects are all there as they were when photographed, not added, removed or rearranged in post.
This simple principle is an ideal, something to go for but not necessarily get overly hung up with. Sometimes I don’t even think about it, sometimes some extra effort is needed. The moons of the planet Hoth from The Empire Strikes Back setups are a good case in point.
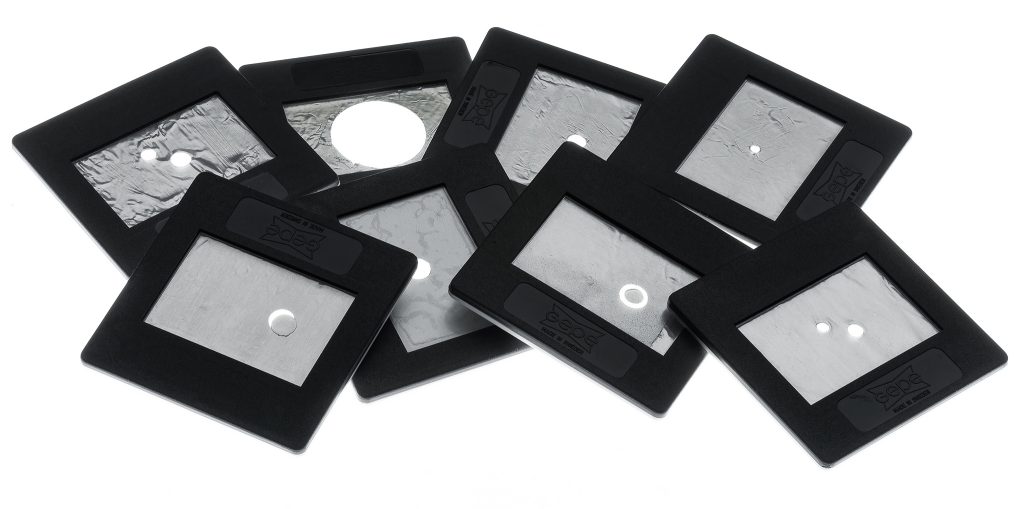
With the early snowy photographs on the reimagined planet Hoth in 2010 I quickly realised the sky was a problem. It looked flat. I figured the skies needed something to make the whole image look more interesting. The three moons of Hoth are never seen from the planet surface in the movie but in MY Hoth they turned out to be essential. Only, the moons would have to be “real”, as in not photoshopped in later. I was a bit fussy with the no-altering rule those days. I dusted my old Reflecta Diamator slide projector and made some custom slides.
The slides I’ve used for throwing the moons or the sun to the tabletop skies. I’ve used this outside the Hoth setup only a couple of times, so it's very much an idea for Hoth only.Figuring out the lights, finding a good angle so that the illusion of the moon/sun would work. At this point it wasn’t clear whether the bright spot was in fact a moon or a sun. In the end I made both versions from this set.The Dawn After, 2010 (Alt. 2024 Edit). This is, I think, the first time I succesfully used the slide projector moon/sun. I edited a new one from the RAW leftovers for this post because frankly the original versions from this era aren’t very good. They were edited in my Powerbook laptop in fairly small size using RAW files from my first DSLR camera, the Canon 400D, with no idea what I was doing. Most images from that time are awfully dark and oversaturated. Also, I favoured that very wide crop ratio then, a thing I do not really like anymore. This image was originally designed for that wide crop so I went with it. The morning sun in this one is just as it was when photographing it, no edits afterwards except for making it a little brighter.
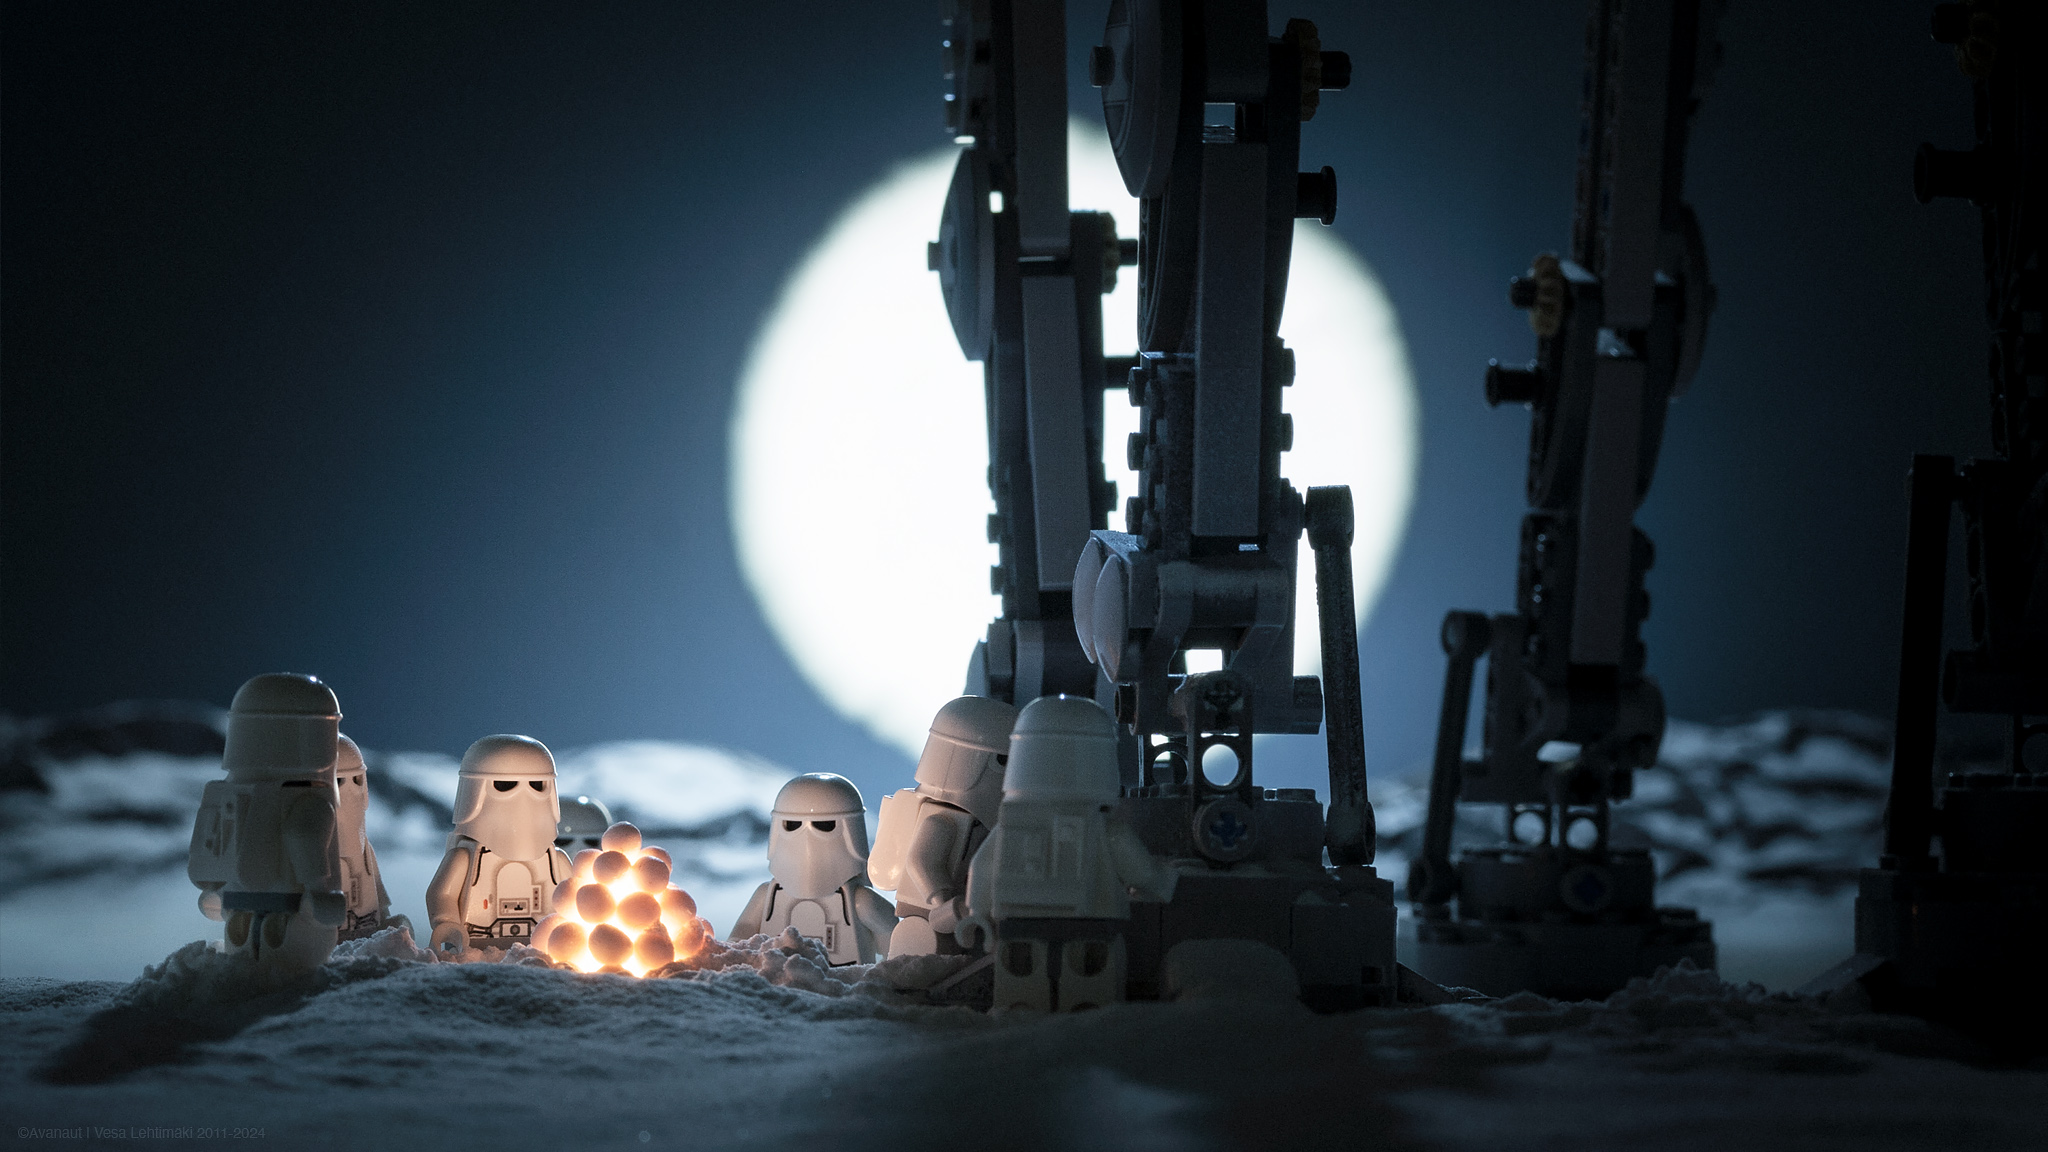
The header photograph, Moonlight Shadow, 2011 (Alt. 2024 Edit), is a prime example of how the projector moon works. This is also not the one I posted originally in 2011. I like to dive into the archives and find alternates, it is fun even after all these years.
The bright moons on the background projected on white or dark blue cardboard sheets sometimes needed tidying. Removing errors in my slide mask handiwork in Photoshop is a thing I can easily live with. Punching perfect round holes through aluminium tape is difficult you see, there are almost always some imperfections here and there and they look huge when projected to the background in big size.
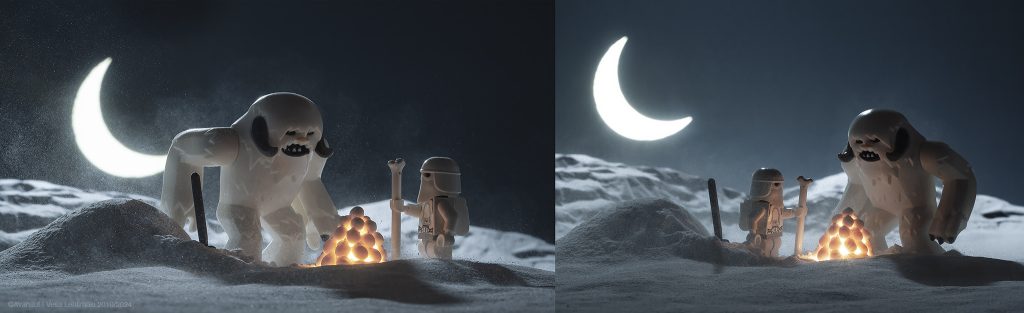
Call of the Wild, 2011 (alt. 2024 Edit). A crescent moon on Hoth, made with a slide projector with punch & die tooled slide. The one on the left is an outtake from the process of figuring out the composition. On the right is a variation of the one I originally posted, not the same exact frame. The moon is not retouched in these.
In total I’ve used this with thirty photographs, give or take.
Transit of a Hoth Moon, 2016. Playing with the idea of several moons of Hoth, different sizes than the one of our Earth, some astronomy thinking kicked in. Our Moon is exceptionally large, proportionally the biggest by far in the solar system. We’re essentially a double planet system. Full solar eclipses like ours are likely quite rare elsewhere in the universe. So, when a moon meets the Hoth sun on the planet’s sky, it might look like this. This was made with the slide you can see among the other slides in the photograph earlier in this post. It needed some cleaning in Photoshop afterwards but it’s real.
The bottom line for this look is that the heavenly bodies are there, the moons and the suns, photographed for real. Until they weren’t.
The Night Blizzard, 2022. This one is a cheat, the sun is photoshopped in, not projected on the background. The look is the same though, or close enough.
With the more recent photographs I have sometimes just photoshopped the moon/sun effect to the sky. But only when I knew I COULD set the slide projector up and it would have looked exactly the same. I mean, my rules, I can bend them if I want to. The look was established with the real thing and I want to keep it looking like that. These days I’m photographing in a space that is much wider and roomier than I used to have but unfortunately it has less depth. There is enough for the camera but not for the slide projector, it makes rigging it a nuisance. So, I cheat.
I have talked about this technique also in my book Small Scenes From a Big Galaxy (DK Children 2015).
Stanley Kubrick’s 2OO1: A Space Odyssey was the first DVD I ever bought. It was also the first Bluray and 4K UHD disc I ever bought. That should say something, I love that film.
There were not too many scale models from the film available until very recently. There was the small 1:144 scale Aurora Orion III Shuttle kit, first released in 1969, later reboxed and re-released by Airfix. The 1:55 scale Aurora Moonbus kit was also released in 1969 with subsequent re-releases. There were some small garage kit runs much later, most notably the 1:32 scale resin EVA pod kit and the elusive big 1:48 scale Atomic City Orion III resin kit. I tried to obtain the big Orion for quite some time but it was like trying to find a living Dodo bird.
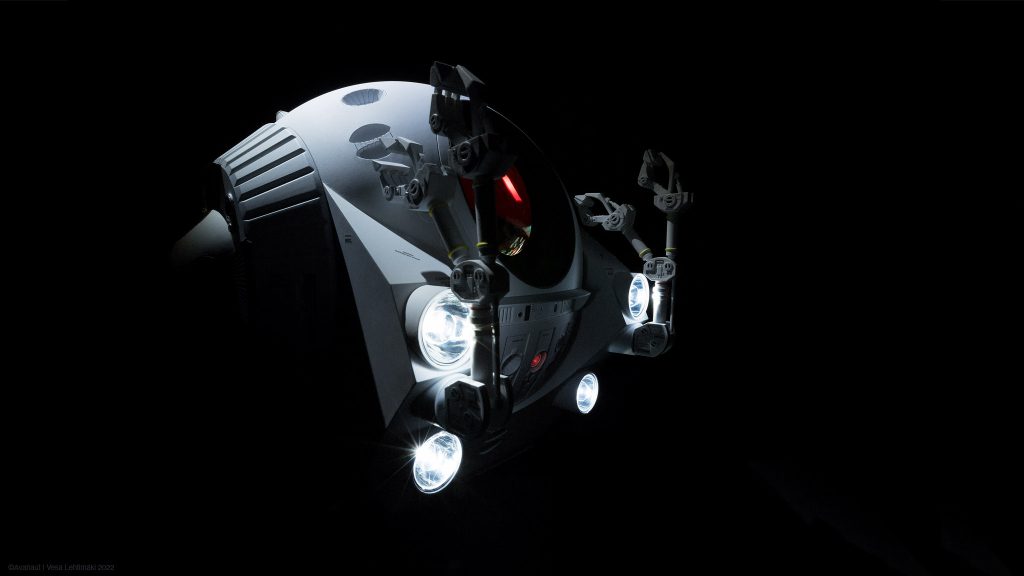
A few years ago kit manufacturer Moebius took on producing some 2OO1 kits in relatively big scales. They have several different kits now out. I first bought and built their big 1:8 scale EVA pod. It’s very pretty but has some issues. The detail is soft here and there and it is a bit awkward to build with the appropriate lights, it wasn’t designed for that. It is doable though and I like the big size, it’s great for photography.
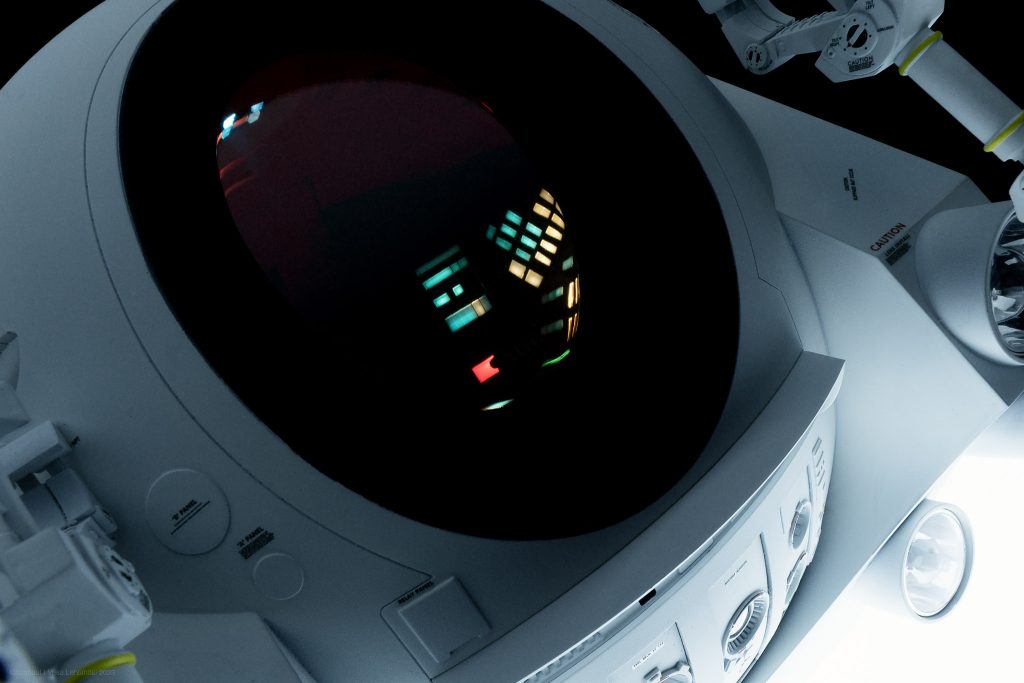
The Moebius 1:8 scale 2OO1: A Space Odyssey EVA pod model is big, about 29 centimeters wide. The headlights are easy to light, it’s the inside that needs some work.The EVA Pod has very little or no weathering, which makes the paint phase easier. Just clean white and some decals. The dashboard was a lot of work to make it light up like that. But as you can imagine, a photograph like this would look so much less interesting if there was just a black window there. The effort is worth it.
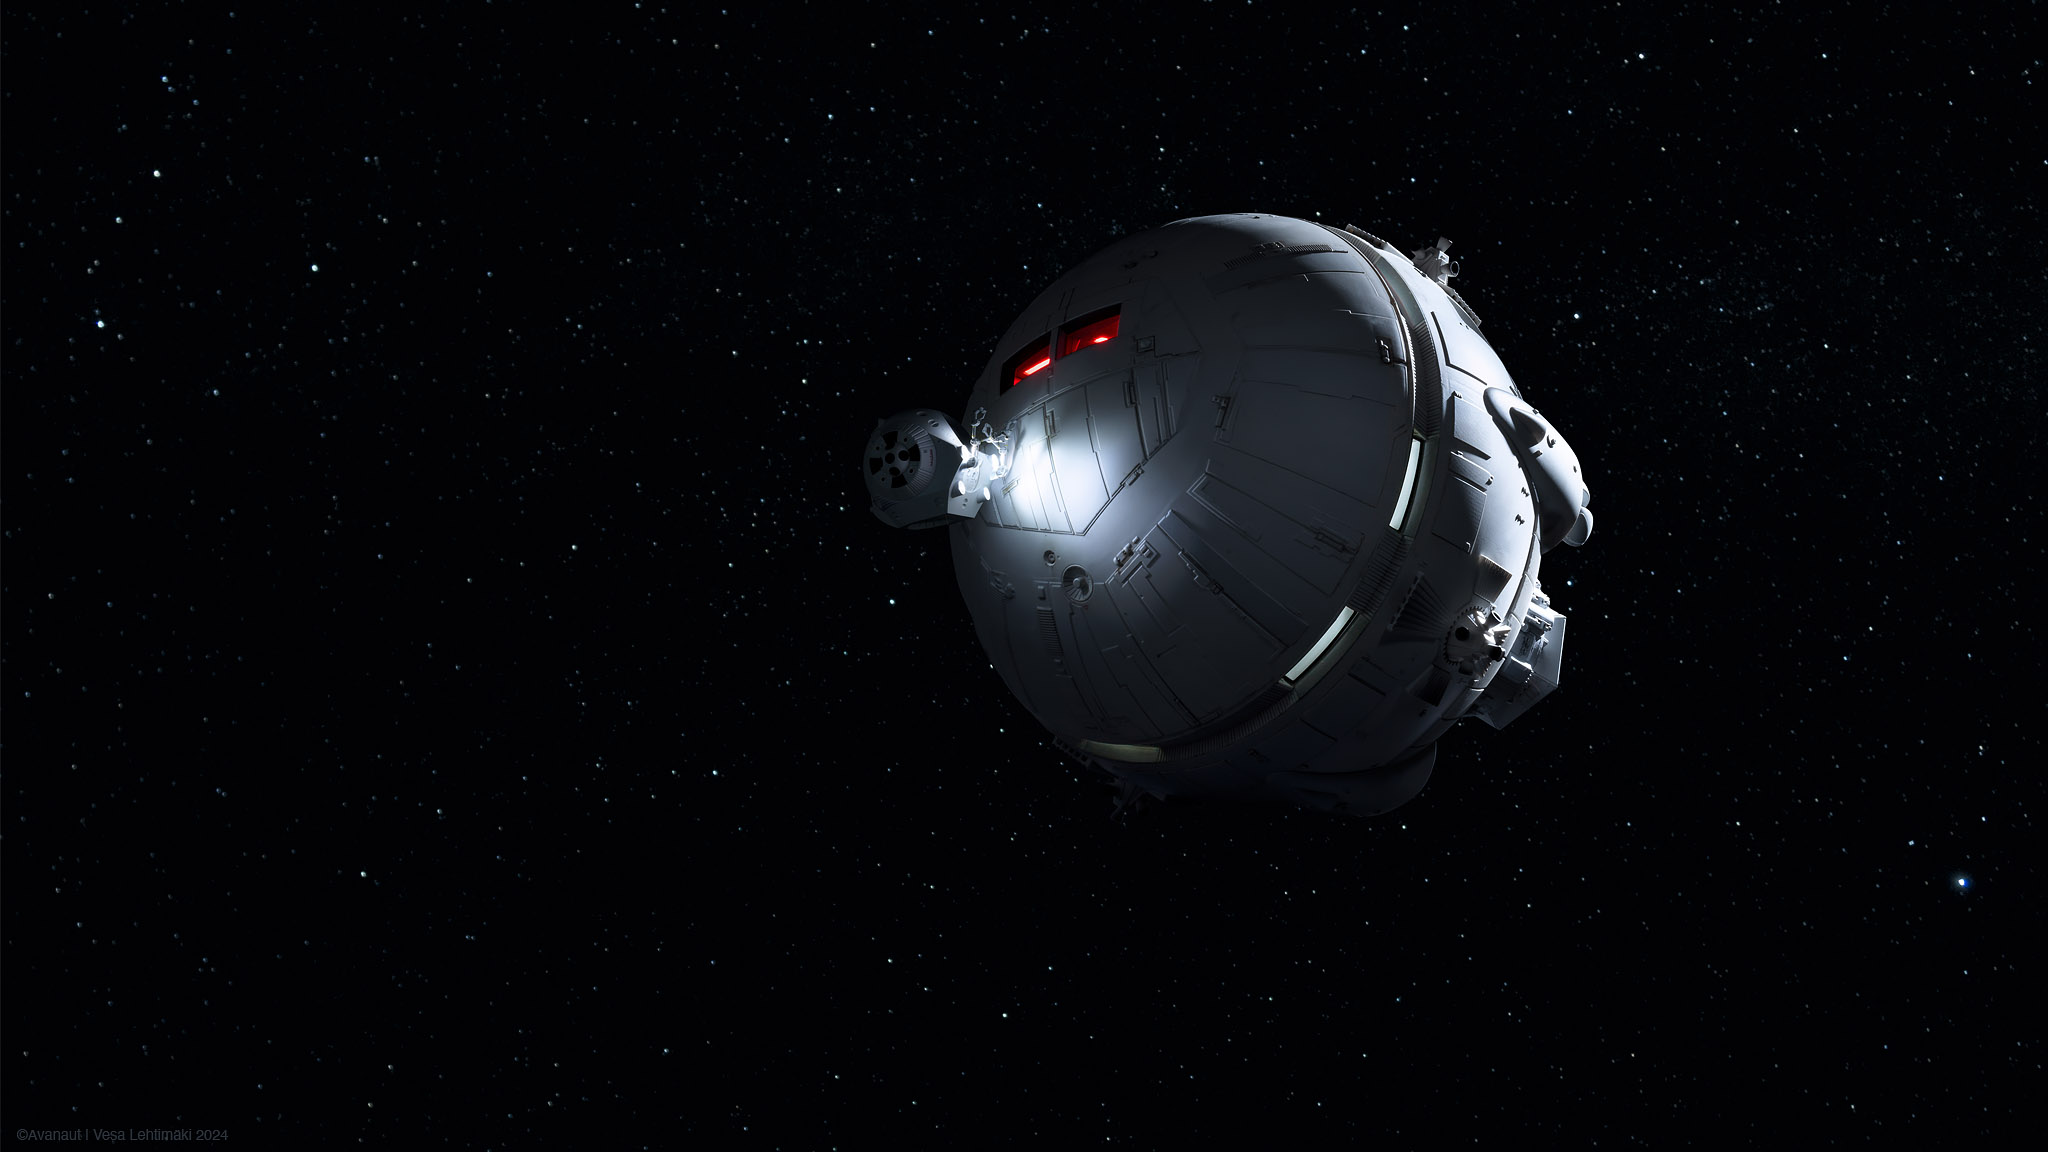
Then I got the 1:48 scale Aries 1B. It’s practically the same size as the EVA pod, they make a nice pair. Like the EVA pod I preordered the Aries the day it first became available. There are lots of aftermarket upgrade parts available for these kits: photoetch and resin parts, 3D-prints, decals and masks. I've not used all there is but there are some upgrades here and there.
Now, Aries 1B, the actual filming model, has an amazing history. As we know, the original models were supposedly all destroyed after the filming wrapped. Some say it was because Stanley Kubrick wanted to prevent them from showing up in other movies later thinking it would diminish the uniqueness of 2OO1. Some say it was simply because there was no budget for storage. Apparently it is a very complicated story with museum plans gone awry. Whatever the reason was, for decades they were thought lost forever. And some really were destroyed, like the big Space Station V. But then, in 2015, out of the blue, the original screen used Aries model turned up and in relatively good condition too. It was restored, auctioned for $344,444, and is now in The Academy of Motion Pictures Arts and Sciences museum in Los Angeles.
The Moebius Aries 1B kit is like the EVA pod kit, big, soft on details and not super well designed thinking about the building experience. The big question for me was whether to light the floor of the passenger cabin like the full size studio set piece. The kit clearly wasn’t meant for this, there is thick plastic and seams in unfortunate places. Furthermore the floor can’t really be seen once the model is finished, just glimpses from a very limited angle are visible.
The lowered underlit elevator pit floor in the Aries 1B Lunar shuttle. This is the look I wanted in my model even though it can’t really be seen from the outside. 2OO1: A Space Odyssey photograph from screencaps.com The colour of the chairs vary from scene to scene, in the screencap they look darker than they actually are. For this I adjusted the colours on my photograph to match, the chairs are more yellow in reality.
What’s the point spending almost a week lighting the floor knowing it won’t be visible once the model is finished? It was a lot of work after all. Knowing it is there is one thing of course, there is satisfaction in that. One could also argue the light from the floor has an effect on the ambient light in the cabin even if the source itself is obscured. It makes the ambience seen thru the tiny windows look right. There are 25 individual leds providing the light in the cabin plus half a dozen red leds for the cockpit, you’ll never know there is that many of them just by looking at the model. Maybe this was a little bit of an overkill but it’s also about peace of mind.
These little things I can have control over when building, lighting and some custom details. It’s the painting and weathering what I fear the most. So many unknowns in the cocktail of pigments and layers. It is always intimidating, sometimes also horrifying.
The original Aries 1B has a very straightforward paint scheme. Basically you could say it’s off-white with some panels ever so slightly grey and everything weathered with what looks like black soot from the manoeuvering thrusters. I decided to paint mine like that to keep it real. But, alas, it didn’t look good, not with my skills. It was too simple and to be honest this off-white colour is not really my favourite. I gave up on the attempts to make the model look like the original. It is often harder than it looks anyway. I decided to take the weathering to a different direction. Unfortunately the decision came a little too late to do a layered paintjob the way I like. I wouldn’t know how to do it on top of that white.
In order to not ruin the paintjob altogether I added some chipping and small details here and there, mostly random waterslide decals from the archives. The decals are small enough to not really make anything of them but they add a little bit of nondescript detail nevertheless methinks. Then just some subtle wear and tear. Not sure if this was the right call but the white just felt kinda wrong – even if it was kinda right.
On the left is what I saw when taking the last masking tapes off of the finished model. The clear flat coat paint mist had penetrated the window seams into the passenger cabin and clinged on the inside of the windows. I managed to pry the model open without too much damage to find the mist all over the place. For a brief moment I considered putting the damn thing back in the box and just walking away. The airbrushed paint mist had dried before reaching any surfaces however, it all came off easily with a damp cloth. From the windows I took it off dabbing it with tape to avoid scratching the soft clear plastic. This is what my model building process is, a comedy of errors.Those landing struts, they are very fiddly. I feared the added weight from the lights and the structures to block the light from leaking would be enough to break them. Putting this on the ground supported by the legs only was a genuinely frightening moment. But there it is.
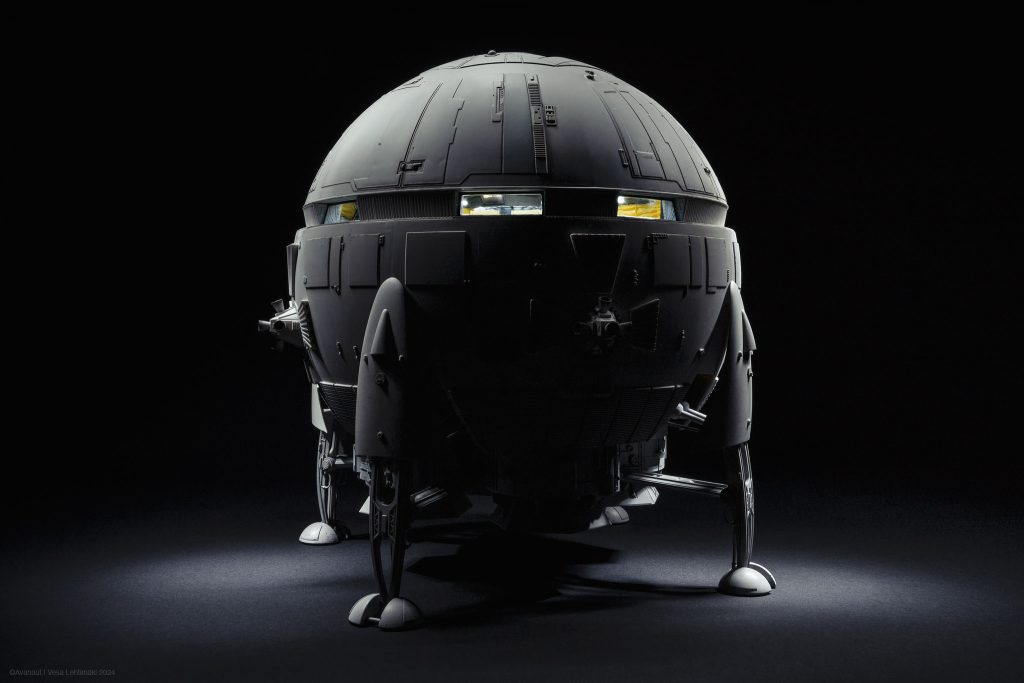
I had some photographs in mind when I was building the model. The header photograph on this post is the first. I wanted to play with interaction of the two 2OO1 models I have. Surely, if the Aries needed attention somewhere between the Earth orbit and the Moon, the EVA pod was the right tool for that. Who said the EVA was a Discovery exclusive? I never heard anything of the sort. Yup, nothing about that.
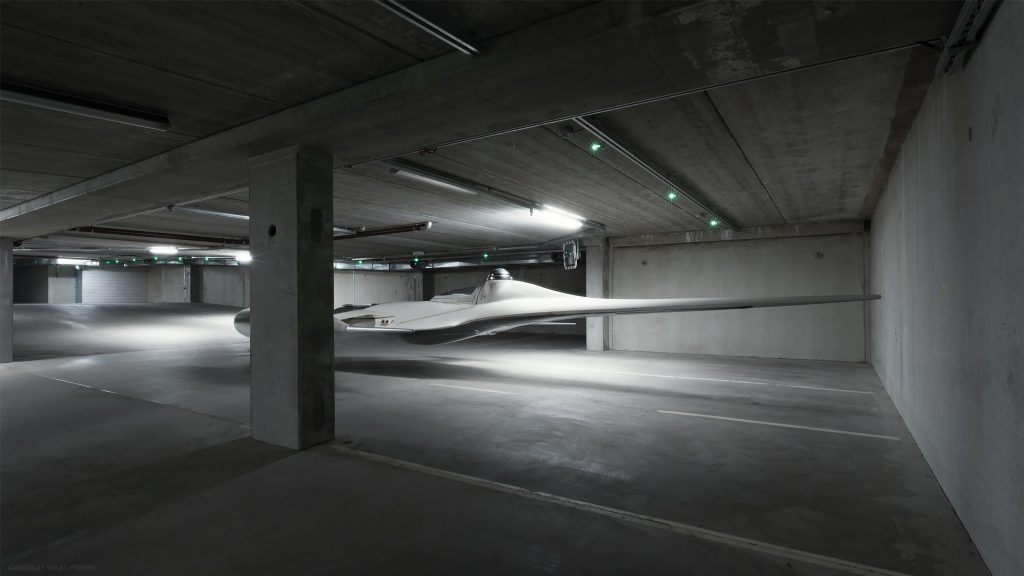
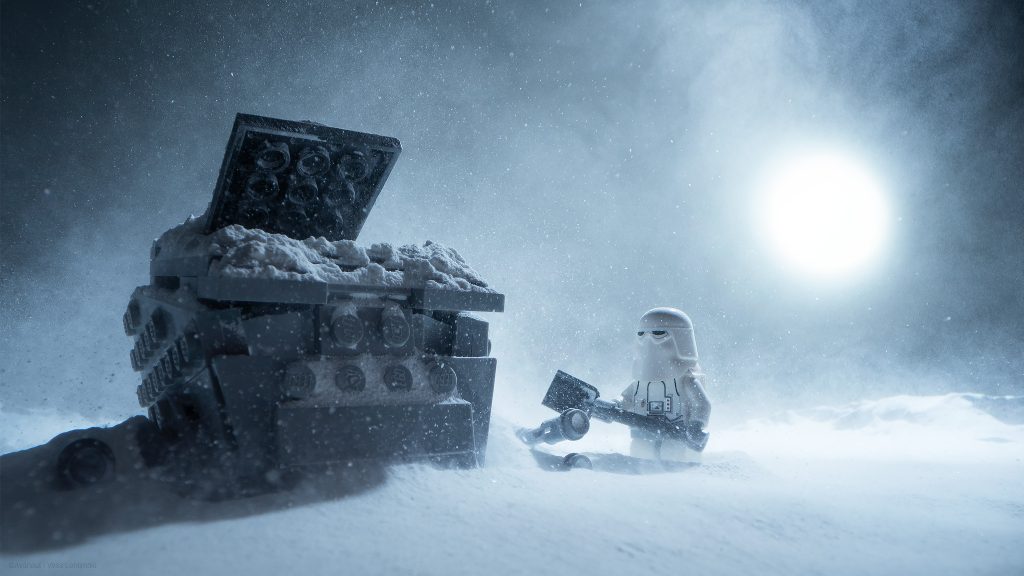
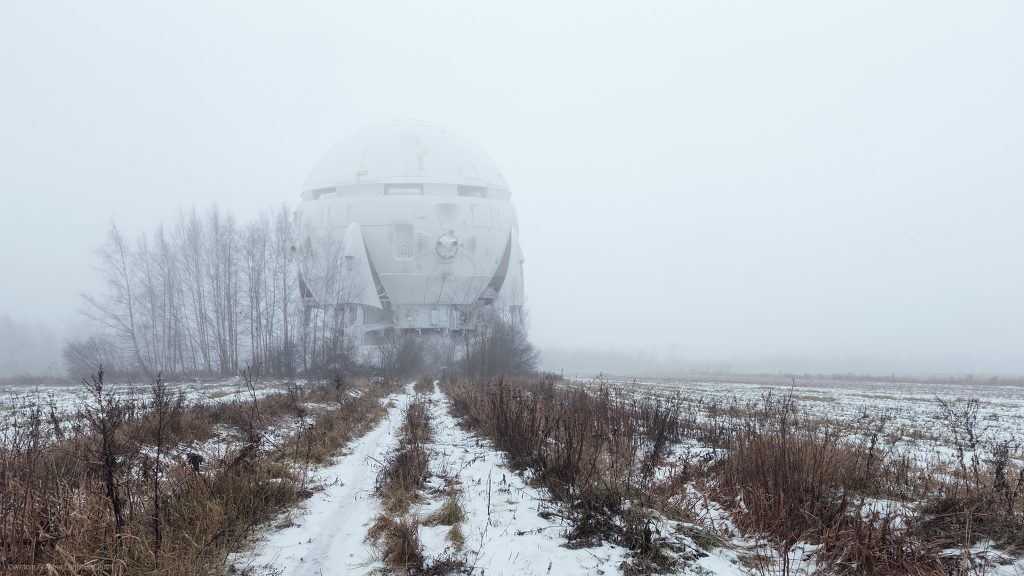
Original caption for this one when I posted it online: For a few years now that thing has been there. Nobody seems to know the owner, there is no activity around it. It’s abandoned for sure. Looks haunted. Some day I’m gonna break into it.
The wintery field photograph is an edit to this blogpost a week after I first published it. The new photograph needed to be here. It is the final step of the process from first photographing the landscape image in December 2021, building the model in stages in 2023-2024 and merging the two. The original photograph was always meant for this, for the Aries 1B in particular. The news of an Aries model to be released turned up just a couple of weeks before I took it.