I fell into a rabbit hole – again – building a scale model. This happens almost every time but this time it seemed deeper than usual. Was it because of me having an exceptionally good time? Or bad? Am I getting old and just slow? I really don’t know.
With these plunges comes a problem. I have trouble focusing on anything else while building. For someone earning a living as a freelancer this is not a good thing. And yes, now that the model is finished I need to find some paid work. I spent way too much time with this.
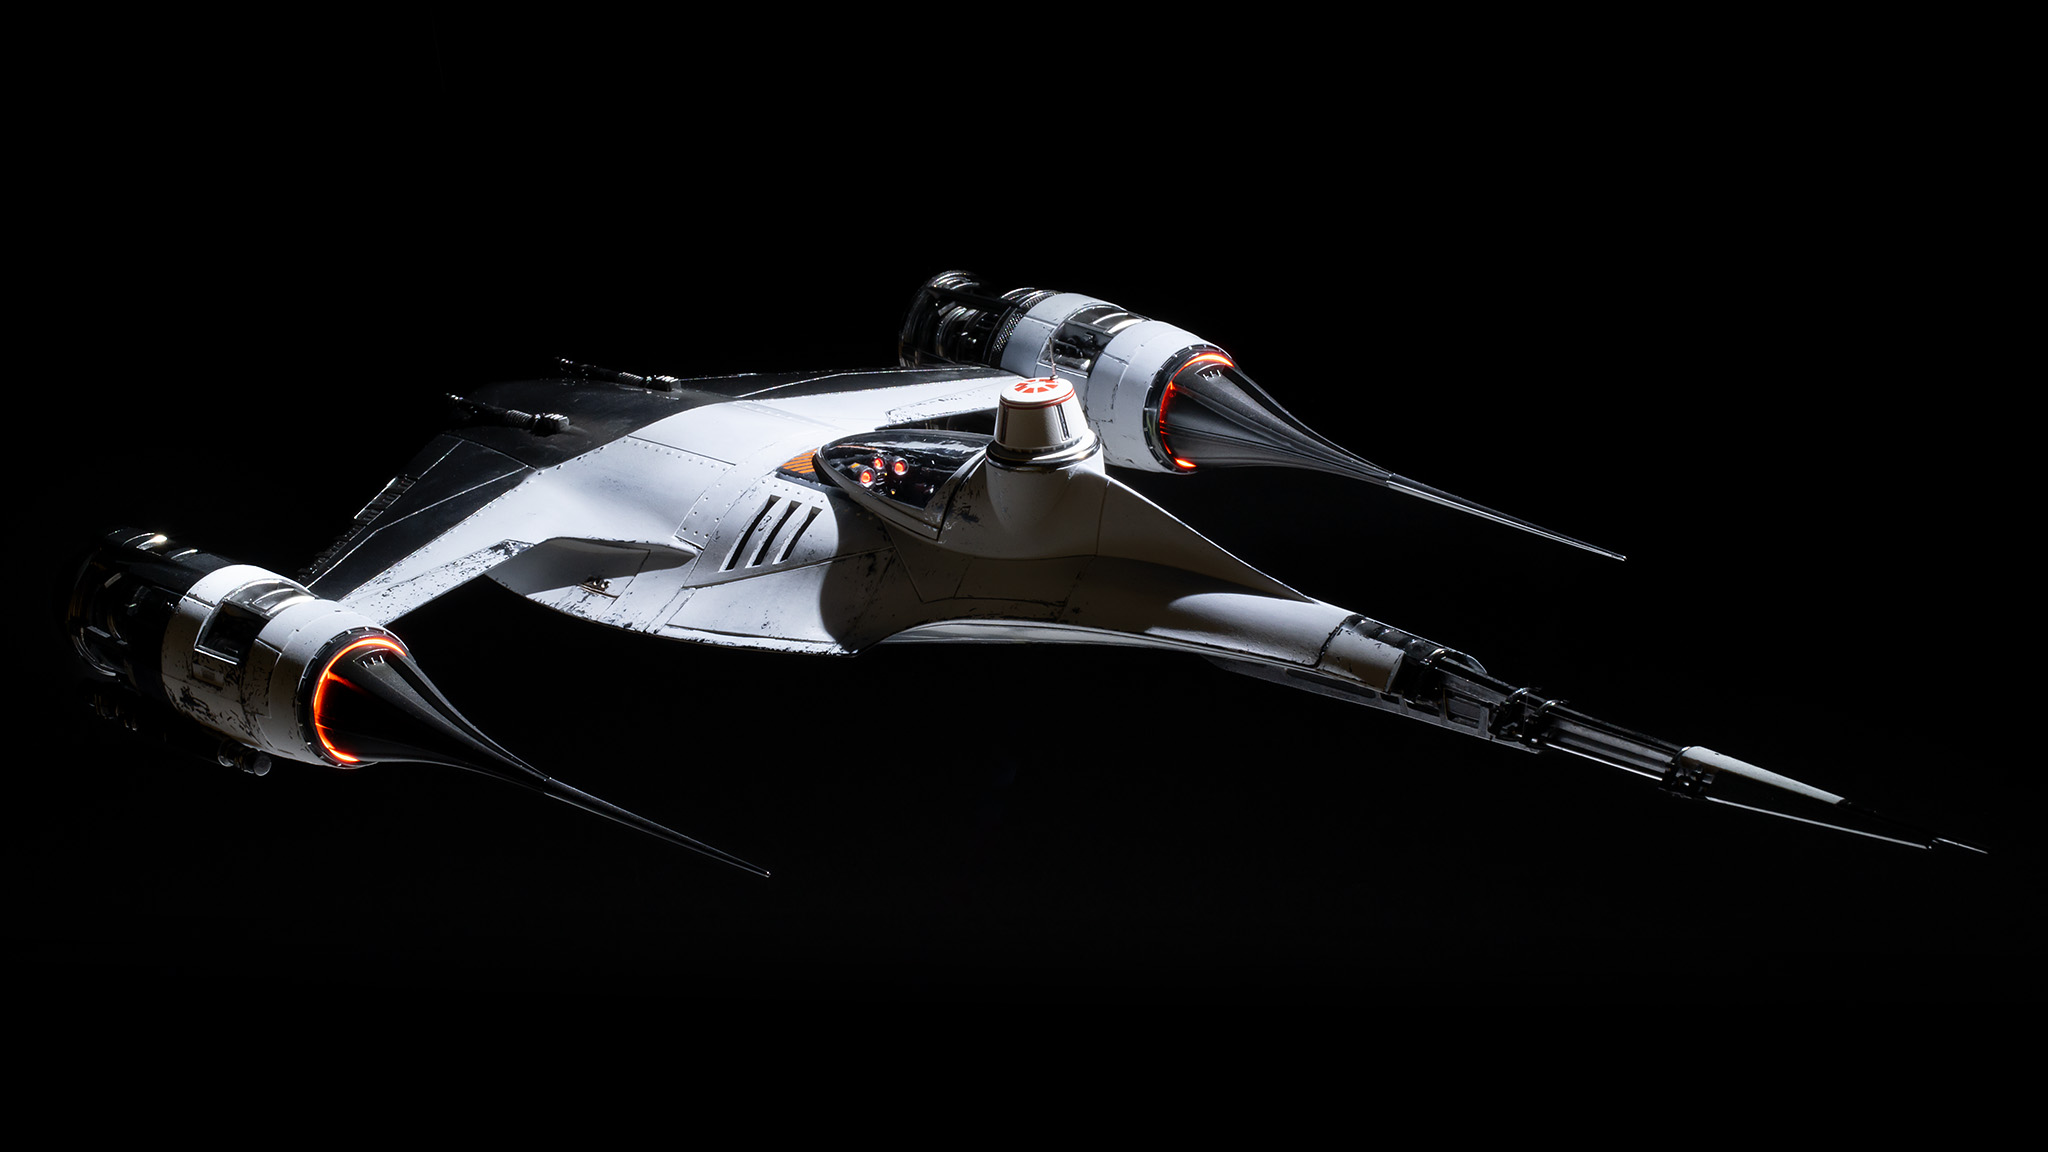
Anyway, I would like to say this Mandalorian N-1 starfighter model is very cool! It is from Revell Germany and at 1/24 scale it is properly big. Finally, a Star Wars plastic injection kit model big enough to my preferences! I made changes to it so it is not like the one you saw in The Mandalorian tv-show. It is not like the one in The Phantom Menace either. It’s a custom, a remake of a small white AMT model I built a couple of years ago, it is the “Royal Guardsman Mark 2”, if you will.
The original white Royal Guardsman N-1 starfighter from 2022. Made from the small and quite simple AMT 1/48 scale model kit.
The cause of the deeper than usual rabbit hole was my ambition. I wanted to try something despite having failed at it earlier. The idea of using a metallic basecoat and painting colour on top is perhaps not ideal but I wanted to try it. It’s because of the effect I thought could be achieved by it. It’s about the top layer of paint peeling off due to friction or stress revealing metallic materials under it. This is a spaceship after all.
The build itself was great fun but the ambitious paint design hit a snag. Here is some of the hardest part of the build process photographed from top.
From left, first attempt to paint the model was a failure. I removed the white with water (as it was painted on a water soluble chipping medium), then I painted it white again. It didn't look good so I removed everything with acetone. New white but it was, again, wrong. Another wipe with acetone and finally, on the right, metallic base before the final white layer – a success this time.
This all took a long time because every layer of paint had to dry for a couple of days. First basecoat, then gloss black, metal on top of that and then white. I was not able to do much else while waiting. The immersion building these is very deep! For me, at least.
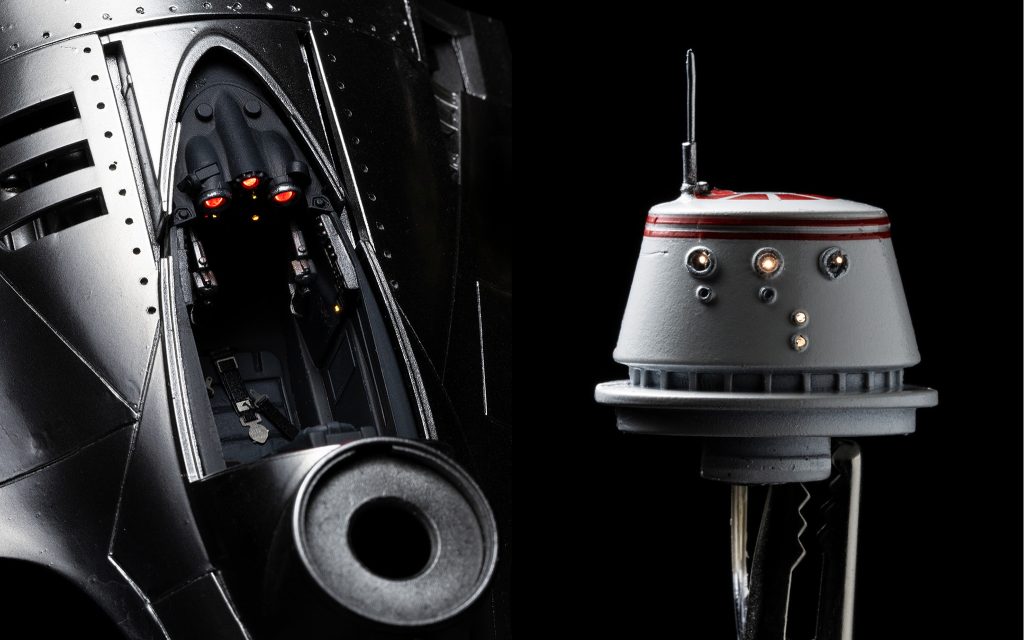
In the meanwhile I tinkered with assorted details around the model. Installing lights here and there.
The big 1/24 scale allows more detail. I made the best of it and tried to install lights, the bare necessities, like the droid head and dashboard gauges. That is 0,25 millimeter optic fiber in the droid head. Only twice as thick as human hair. For the dashboard I chose red because it just looks better than blue on digital camera sensor. The wavelength of blue leds act weird on camera. The seat belts are from a Mercedes Benz upgrade sheet I bought from a local hobby store.
In the end everything worked quite well and I am very happy with the final version. I think this willl perform well in photographs once I get there.
I have never built a model twice. Once a model is finished I don’t want to see it for a while. You know? There has to be some distance before I can think of photographing it. But with this one I don’t feel that need and I’m thinking of building another one. Some day.
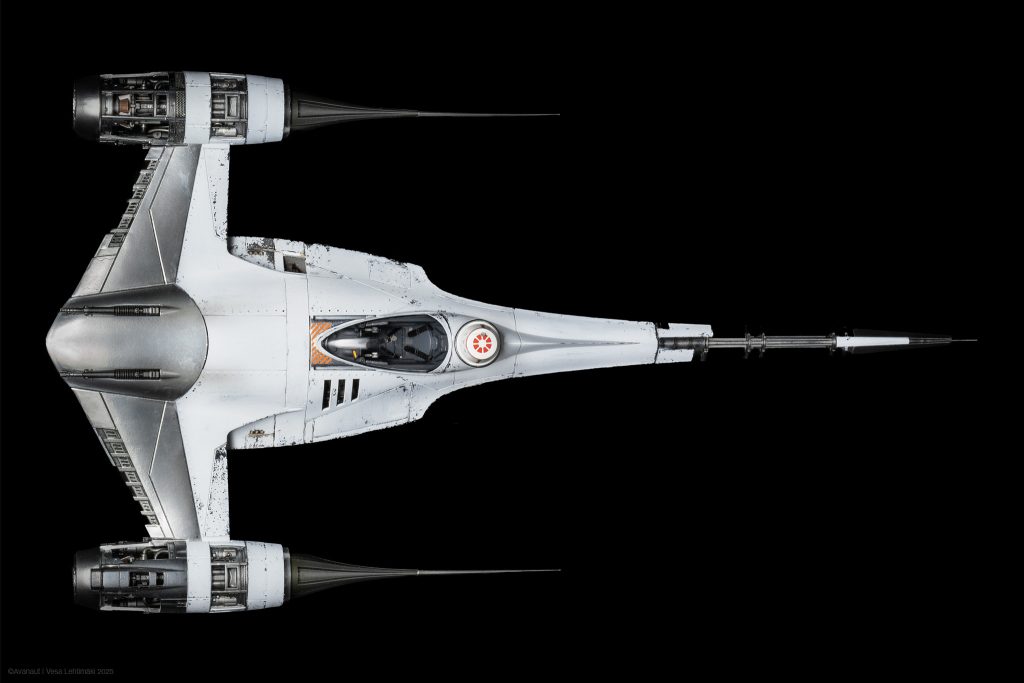
The finished model, top view. Not much added weathering after the paintjob. A couple of decals but not much more. But to dig in deeper, that orange diagonal stripe decal in front of the canopy is actually from the same Microscale Rio grande decal sheet they used for the first X-wing model ever made in 1976, the one known as Blue 1. Same location too, in front of the canopy. The blue markings were painted red (Red 2) for filming and the blue X-wing was never seen on screen in the blue livery. Microscale still produces the same decal sheet and I happened to have one left over from earlier modelmaking projects. This was a nice hommage to the first X-wing I think.
From my early days of photographing Lego I have followed a guideline of not altering the photograph after I shoot it. I set this rule to me myself because otherwise I felt this would be more like a photoillustration thing than a photography project. Allowed was removing wires or supports, adjusting colours, contrasts and such, even cropping. The snow in my photographs doesn’t always flow quite like I’d like it to and I have used patches from other exposures to fix that at times. But this is the extreme. I have always avoided any altering of the image in a way that could be considered constructing it as it was a puzzle. That is to say, the subjects are all there as they were when photographed, not added, removed or rearranged in post.
This simple principle is an ideal, something to go for but not necessarily get overly hung up with. Sometimes I don’t even think about it, sometimes some extra effort is needed. The moons of the planet Hoth from The Empire Strikes Back setups are a good case in point.
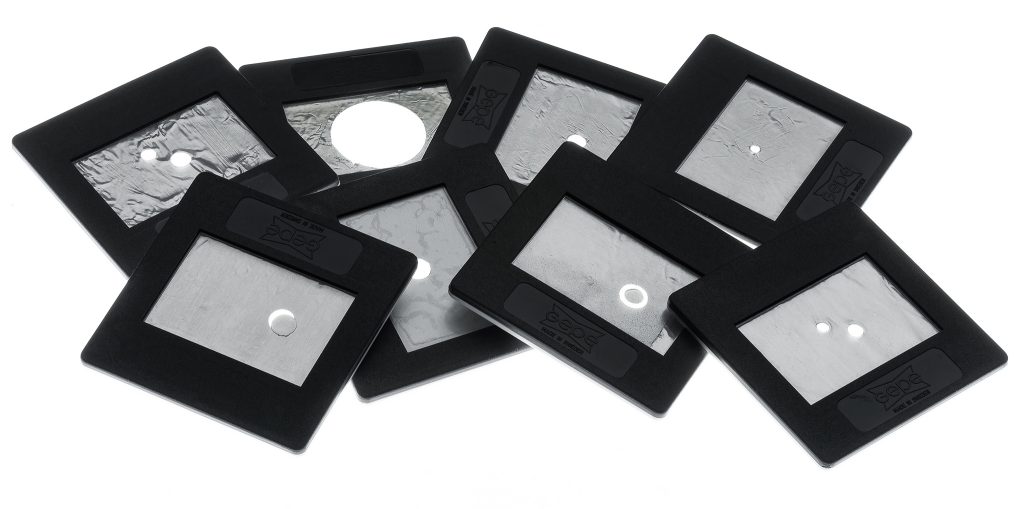
With the early snowy photographs on the reimagined planet Hoth in 2010 I quickly realised the sky was a problem. It looked flat. I figured the skies needed something to make the whole image look more interesting. The three moons of Hoth are never seen from the planet surface in the movie but in MY Hoth they turned out to be essential. Only, the moons would have to be “real”, as in not photoshopped in later. I was a bit fussy with the no-altering rule those days. I dusted my old Reflecta Diamator slide projector and made some custom slides.
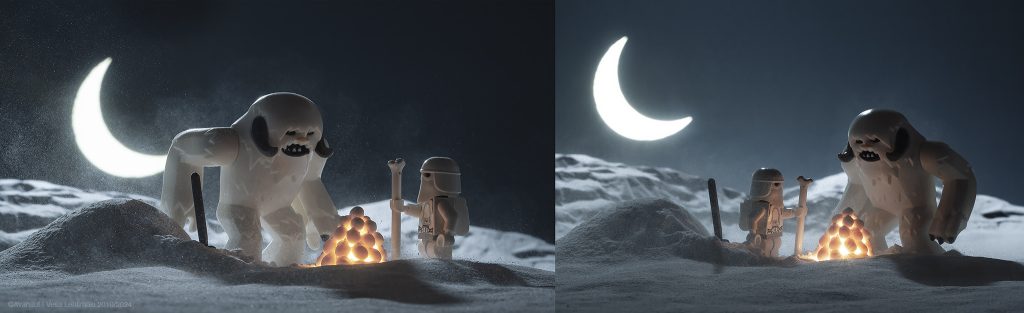
The slides I’ve used for throwing the moons or the sun to the tabletop skies. I’ve used this outside the Hoth setup only a couple of times, so it's very much an idea for Hoth only.Figuring out the lights, finding a good angle so that the illusion of the moon/sun would work. At this point it wasn’t clear whether the bright spot was in fact a moon or a sun. In the end I made both versions from this set.The Dawn After, 2010 (Alt. 2024 Edit). This is, I think, the first time I succesfully used the slide projector moon/sun. I edited a new one from the RAW leftovers for this post because frankly the original versions from this era aren’t very good. They were edited in my Powerbook laptop in fairly small size using RAW files from my first DSLR camera, the Canon 400D, with no idea what I was doing. Most images from that time are awfully dark and oversaturated. Also, I favoured that very wide crop ratio then, a thing I do not really like anymore. This image was originally designed for that wide crop so I went with it. The morning sun in this one is just as it was when photographing it, no edits afterwards except for making it a little brighter.
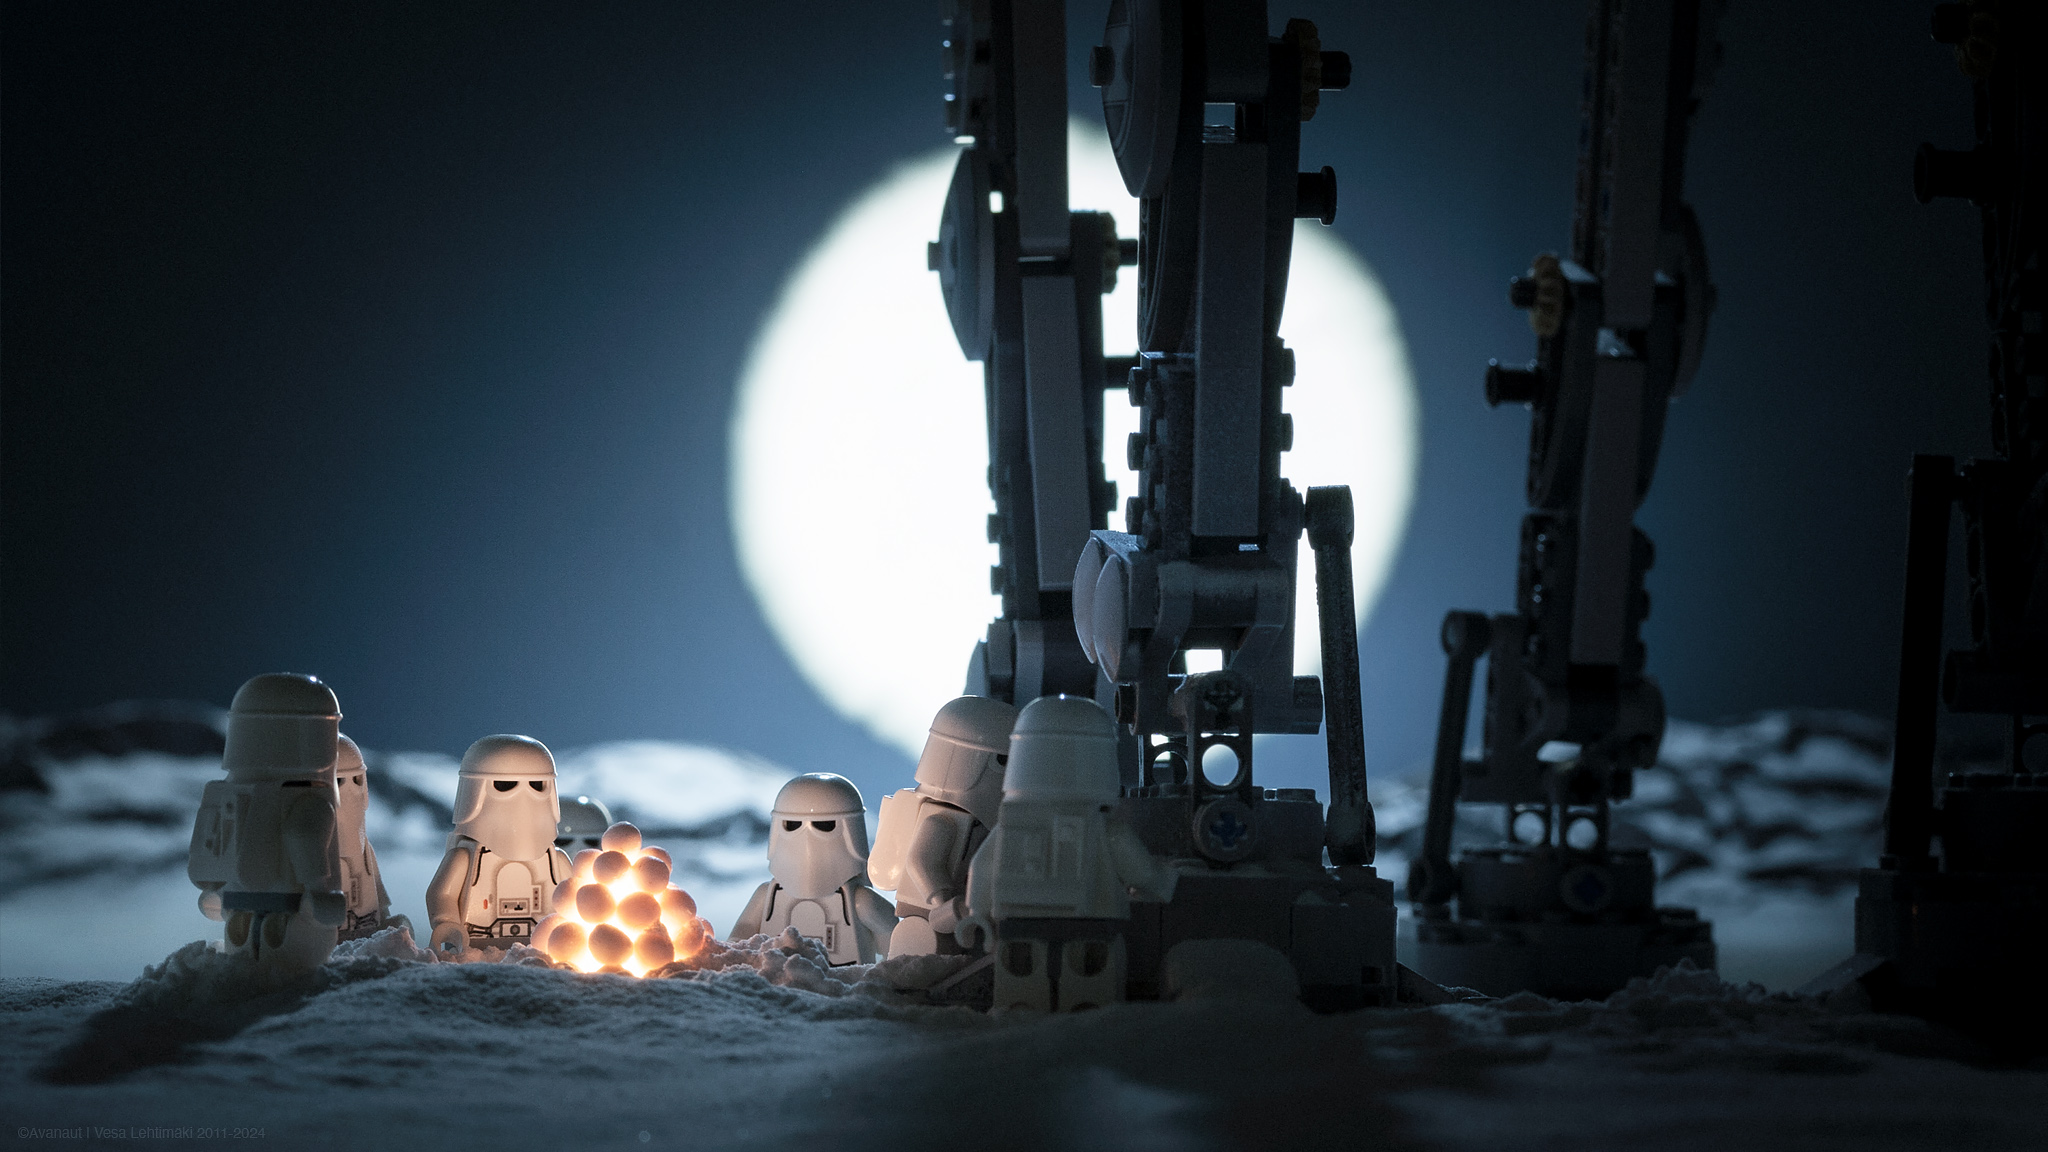
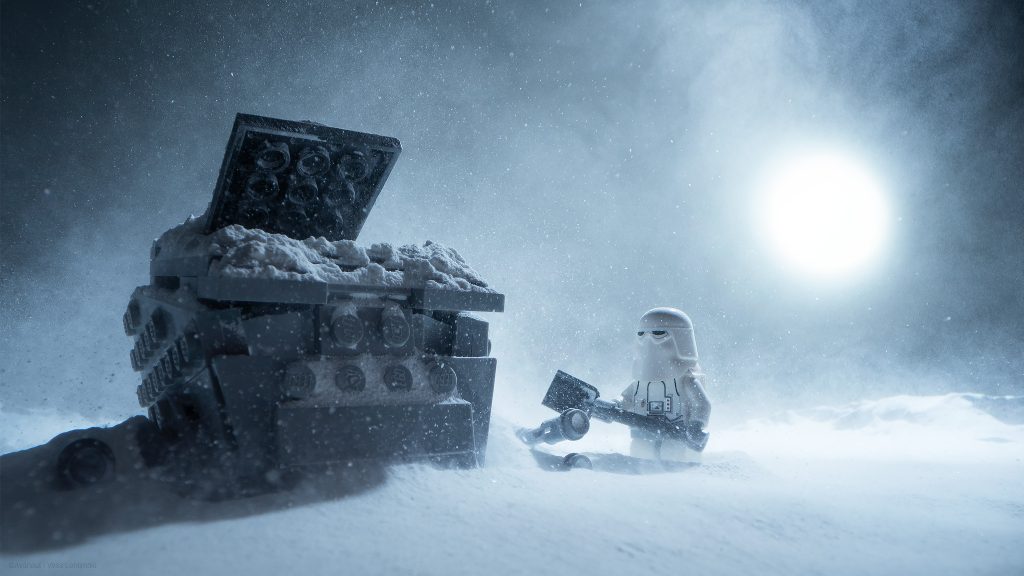
The header photograph, Moonlight Shadow, 2011 (Alt. 2024 Edit), is a prime example of how the projector moon works. This is also not the one I posted originally in 2011. I like to dive into the archives and find alternates, it is fun even after all these years.
The bright moons on the background projected on white or dark blue cardboard sheets sometimes needed tidying. Removing errors in my slide mask handiwork in Photoshop is a thing I can easily live with. Punching perfect round holes through aluminium tape is difficult you see, there are almost always some imperfections here and there and they look huge when projected to the background in big size.
Call of the Wild, 2011 (alt. 2024 Edit). A crescent moon on Hoth, made with a slide projector with punch & die tooled slide. The one on the left is an outtake from the process of figuring out the composition. On the right is a variation of the one I originally posted, not the same exact frame. The moon is not retouched in these.
In total I’ve used this with thirty photographs, give or take.
Transit of a Hoth Moon, 2016. Playing with the idea of several moons of Hoth, different sizes than the one of our Earth, some astronomy thinking kicked in. Our Moon is exceptionally large, proportionally the biggest by far in the solar system. We’re essentially a double planet system. Full solar eclipses like ours are likely quite rare elsewhere in the universe. So, when a moon meets the Hoth sun on the planet’s sky, it might look like this. This was made with the slide you can see among the other slides in the photograph earlier in this post. It needed some cleaning in Photoshop afterwards but it’s real.
The bottom line for this look is that the heavenly bodies are there, the moons and the suns, photographed for real. Until they weren’t.
The Night Blizzard, 2022. This one is a cheat, the sun is photoshopped in, not projected on the background. The look is the same though, or close enough.
With the more recent photographs I have sometimes just photoshopped the moon/sun effect to the sky. But only when I knew I COULD set the slide projector up and it would have looked exactly the same. I mean, my rules, I can bend them if I want to. The look was established with the real thing and I want to keep it looking like that. These days I’m photographing in a space that is much wider and roomier than I used to have but unfortunately it has less depth. There is enough for the camera but not for the slide projector, it makes rigging it a nuisance. So, I cheat.
I have talked about this technique also in my book Small Scenes From a Big Galaxy (DK Children 2015).