Musings about Lego indoors photography in the Star Wars niche. Not terribly much options for that but enough to be inspired.
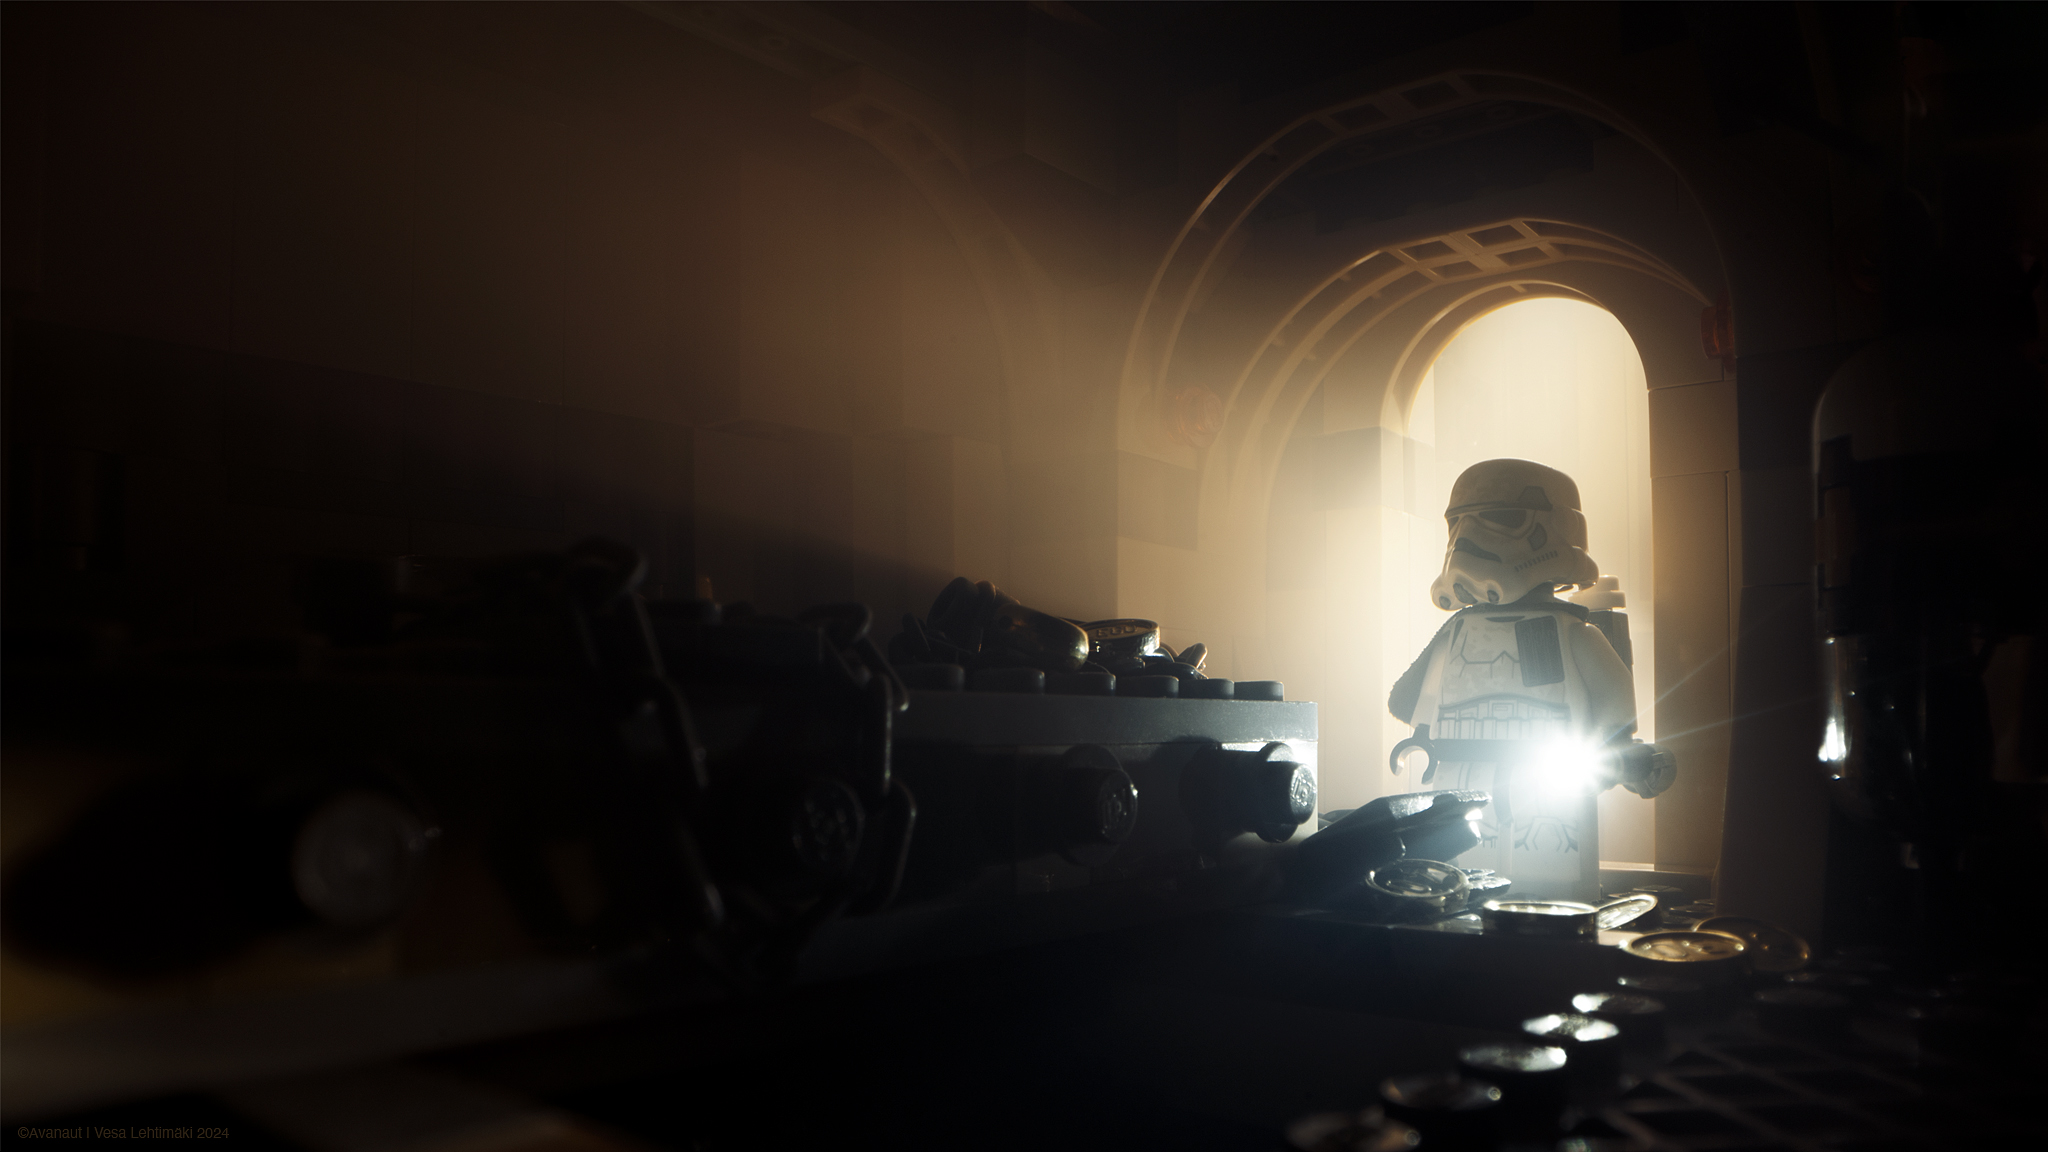
An insight to the character with the name TK-24/7. He has appeared in my photographs for a good while now.
From my early days of photographing Lego I have followed a guideline of not altering the photograph after I shoot it. I set this rule to me myself because otherwise I felt this would be more like a photoillustration thing than a photography project. Allowed was removing wires or supports, adjusting colours, contrasts and such, even cropping. The snow in my photographs doesn’t always flow quite like I’d like it to and I have used patches from other exposures to fix that at times. But this is the extreme. I have always avoided any altering of the image in a way that could be considered constructing it as it was a puzzle. That is to say, the subjects are all there as they were when photographed, not added, removed or rearranged in post.
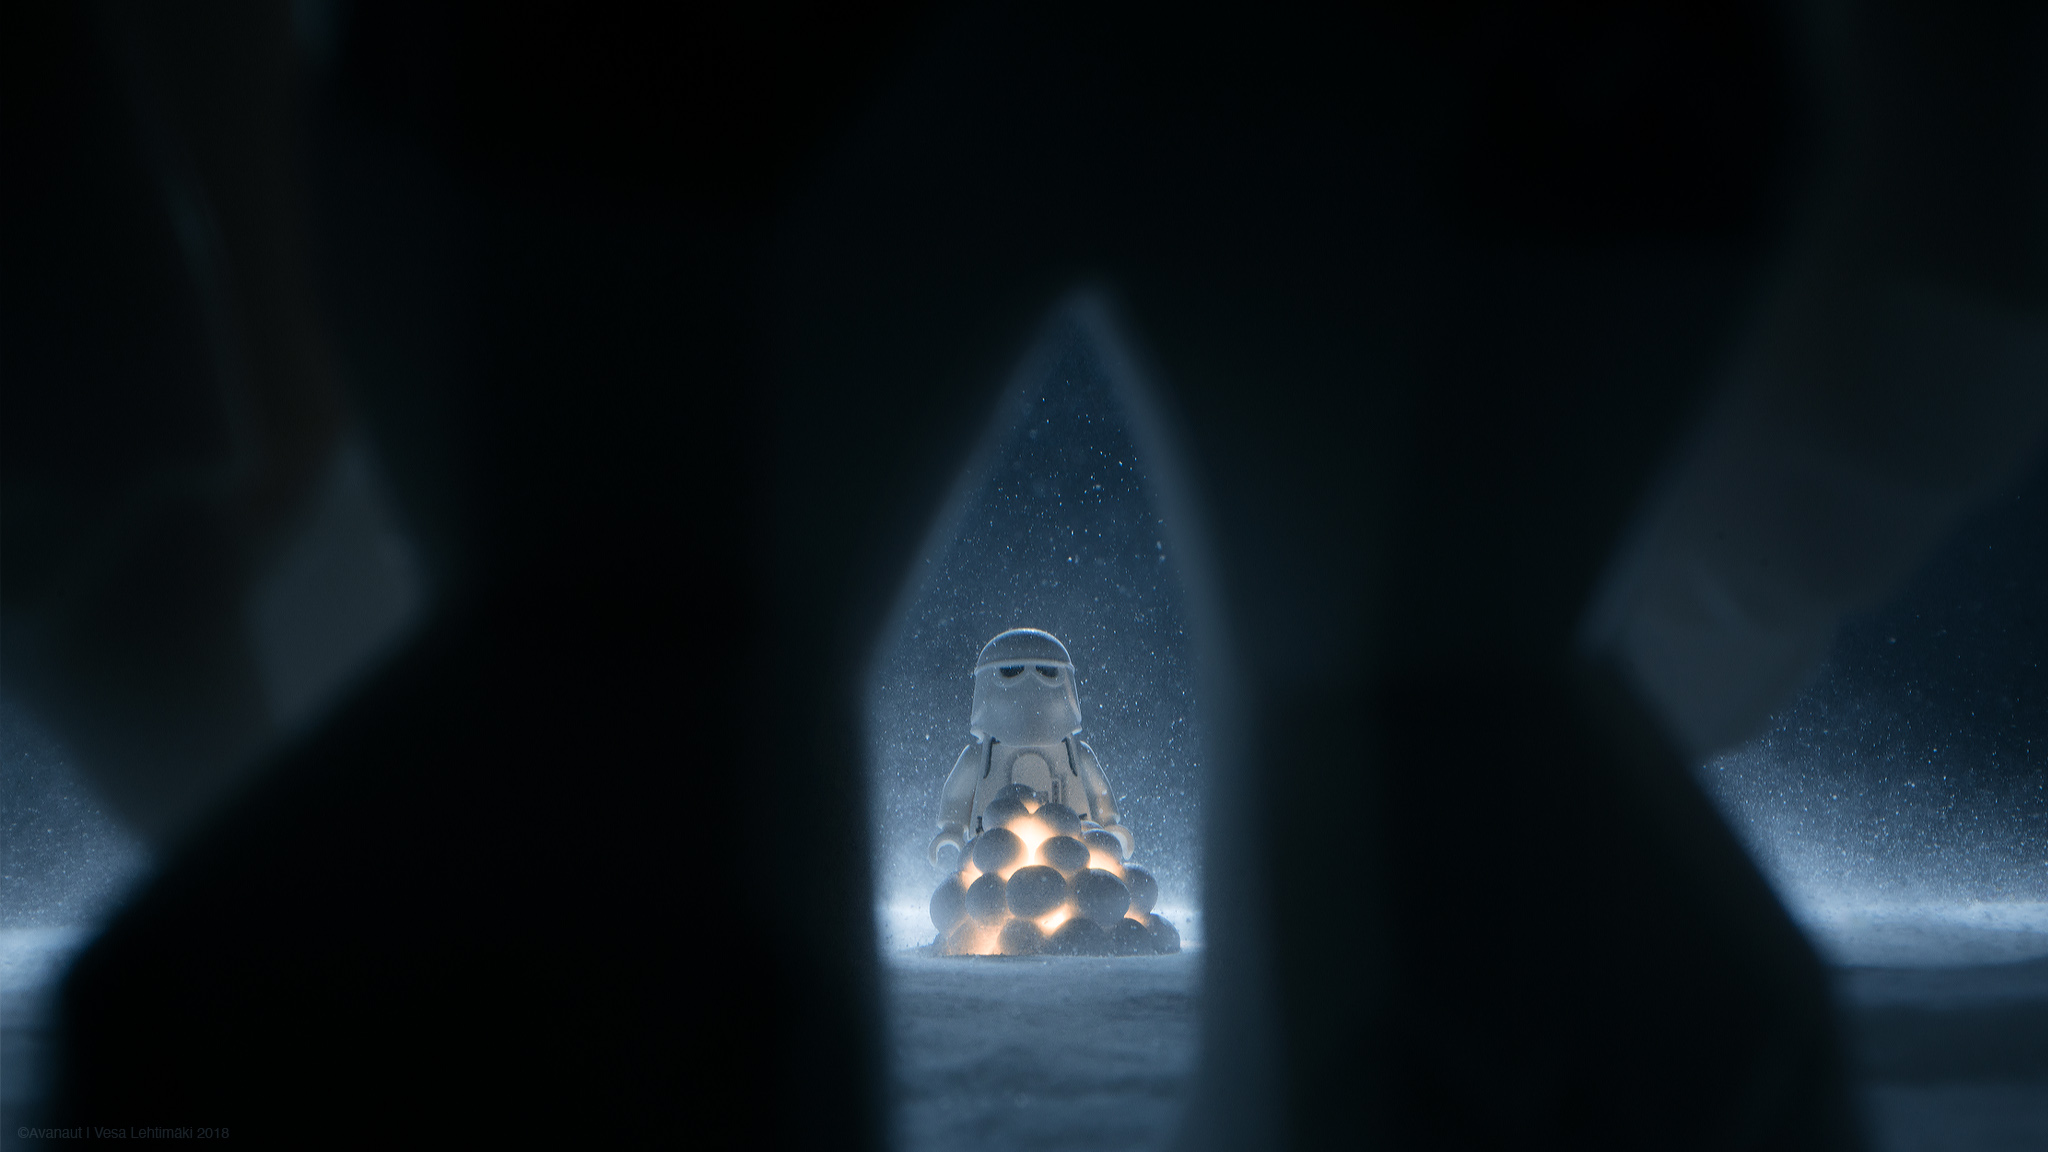
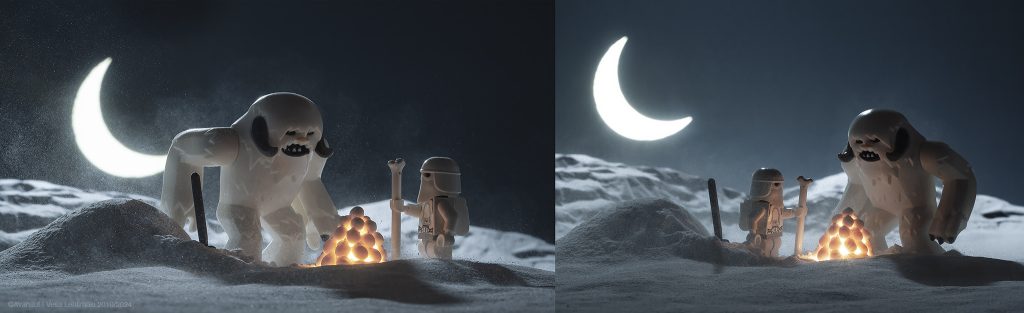
This simple principle is an ideal, something to go for but not necessarily get overly hung up with. Sometimes I don’t even think about it, sometimes some extra effort is needed. The moons of the planet Hoth from The Empire Strikes Back setups are a good case in point.
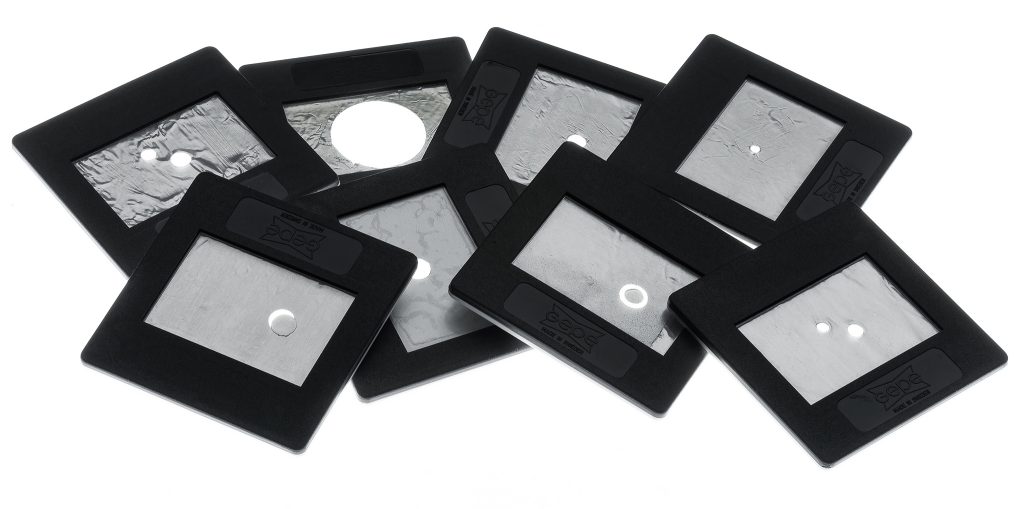
With the early snowy photographs on the reimagined planet Hoth in 2010 I quickly realised the sky was a problem. It looked flat. I figured the skies needed something to make the whole image look more interesting. The three moons of Hoth are never seen from the planet surface in the movie but in MY Hoth they turned out to be essential. Only, the moons would have to be “real”, as in not photoshopped in later. I was a bit fussy with the no-altering rule those days. I dusted my old Reflecta Diamator slide projector and made some custom slides.


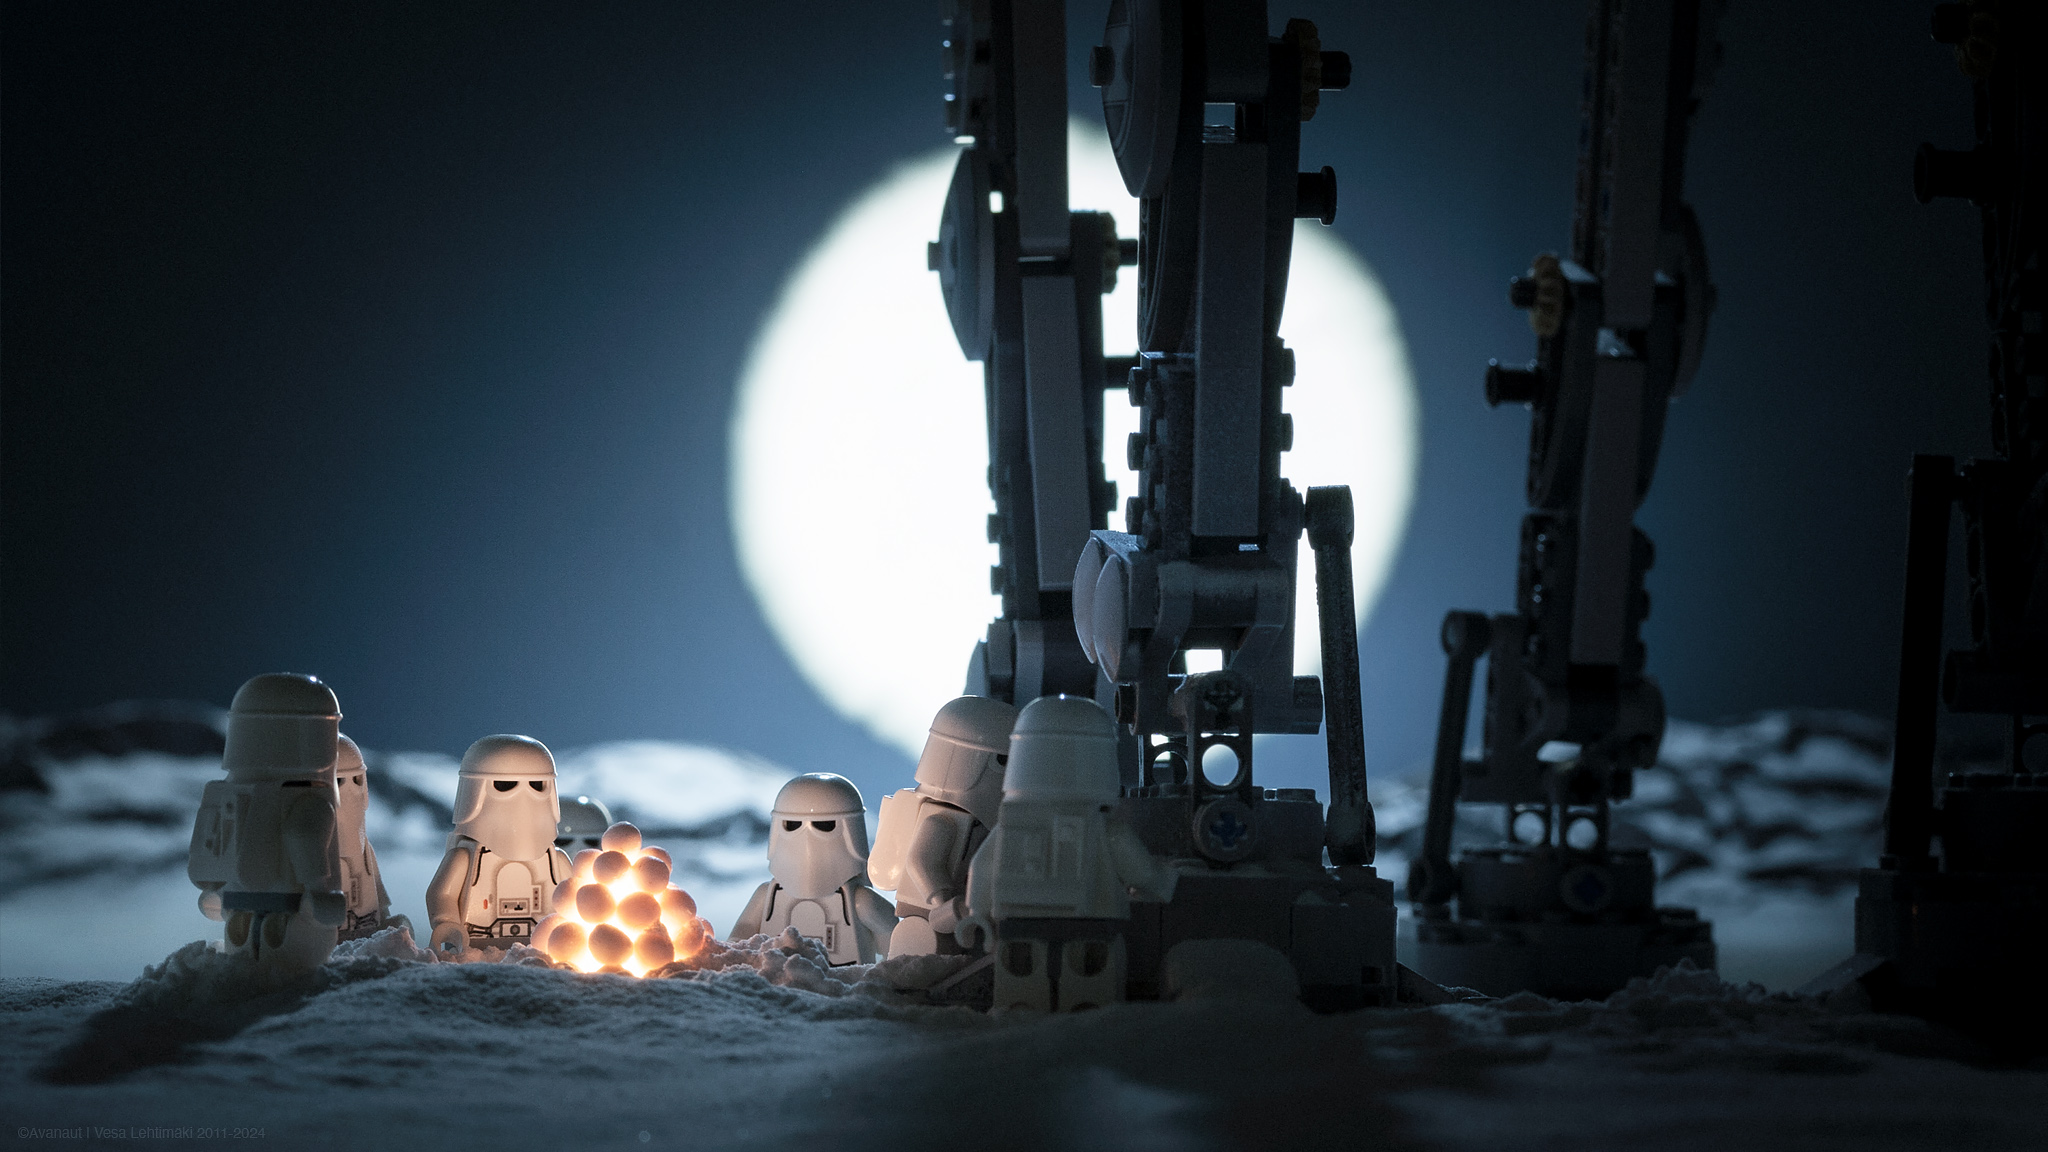
The header photograph, Moonlight Shadow, 2011 (Alt. 2024 Edit), is a prime example of how the projector moon works. This is also not the one I posted originally in 2011. I like to dive into the archives and find alternates, it is fun even after all these years.
The bright moons on the background projected on white or dark blue cardboard sheets sometimes needed tidying. Removing errors in my slide mask handiwork in Photoshop is a thing I can easily live with. Punching perfect round holes through aluminium tape is difficult you see, there are almost always some imperfections here and there and they look huge when projected to the background in big size.
In total I’ve used this with thirty photographs, give or take.
The bottom line for this look is that the heavenly bodies are there, the moons and the suns, photographed for real. Until they weren’t.
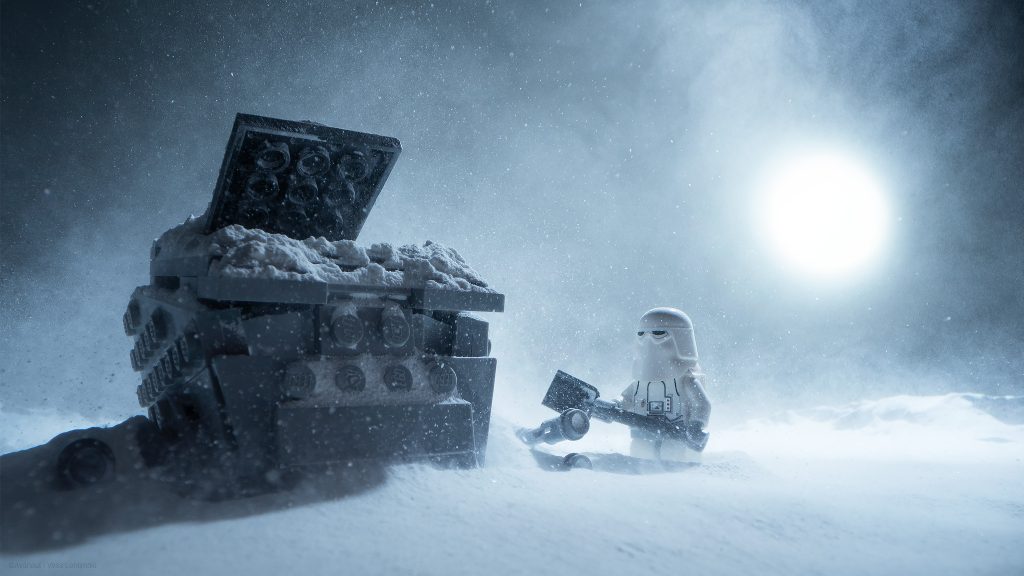
With the more recent photographs I have sometimes just photoshopped the moon/sun effect to the sky. But only when I knew I COULD set the slide projector up and it would have looked exactly the same. I mean, my rules, I can bend them if I want to. The look was established with the real thing and I want to keep it looking like that. These days I’m photographing in a space that is much wider and roomier than I used to have but unfortunately it has less depth. There is enough for the camera but not for the slide projector, it makes rigging it a nuisance. So, I cheat.
I have talked about this technique also in my book Small Scenes From a Big Galaxy (DK Children 2015).
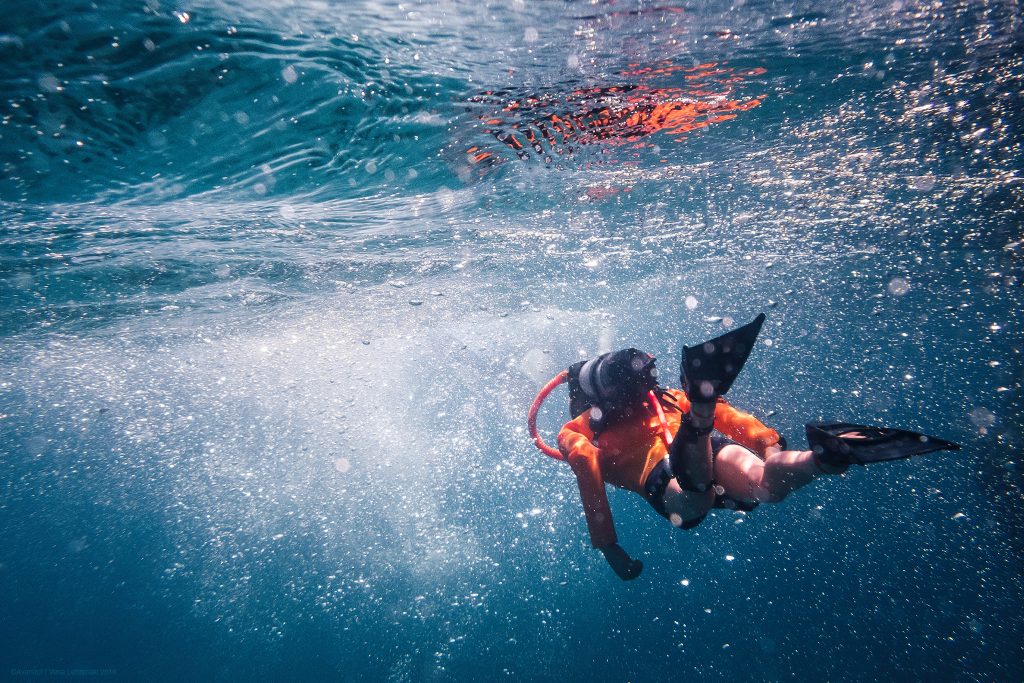
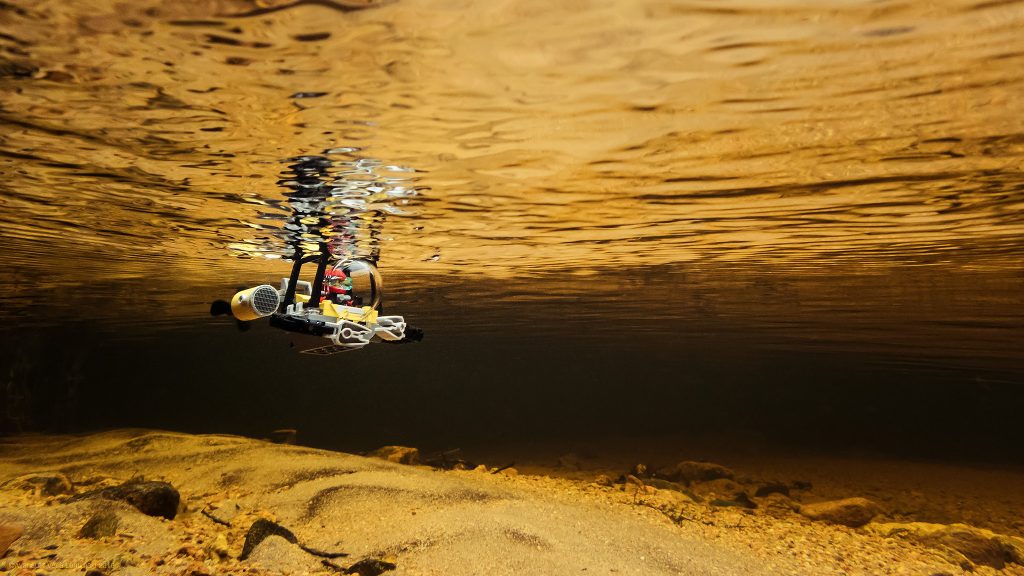
In 2015 I got an idea. We were about to embark on a family holiday trip to Italy and a couple of days before we left I rushed to a local camera store and bought the Olympus Tough TG-4, a new version of their waterproof camera, just released. I wanted to try underwater photography.
In the last minutes of packing I threw in an Action Man we had, one with scuba gear. I had tried photographing it in a water container earlier with poor results. I didn’t expect terribly much from this but with Jacques Cousteau in mind I wanted to give it a try.
During our stay in Italy we were in a place where the waters weren’t clear, it was a disappointment, but a few days in our holiday we decided to take a daytrip to the island of Ponza, 33 kilometers from the coast. There I managed an hour on the beach in clear waters with the Action Man.

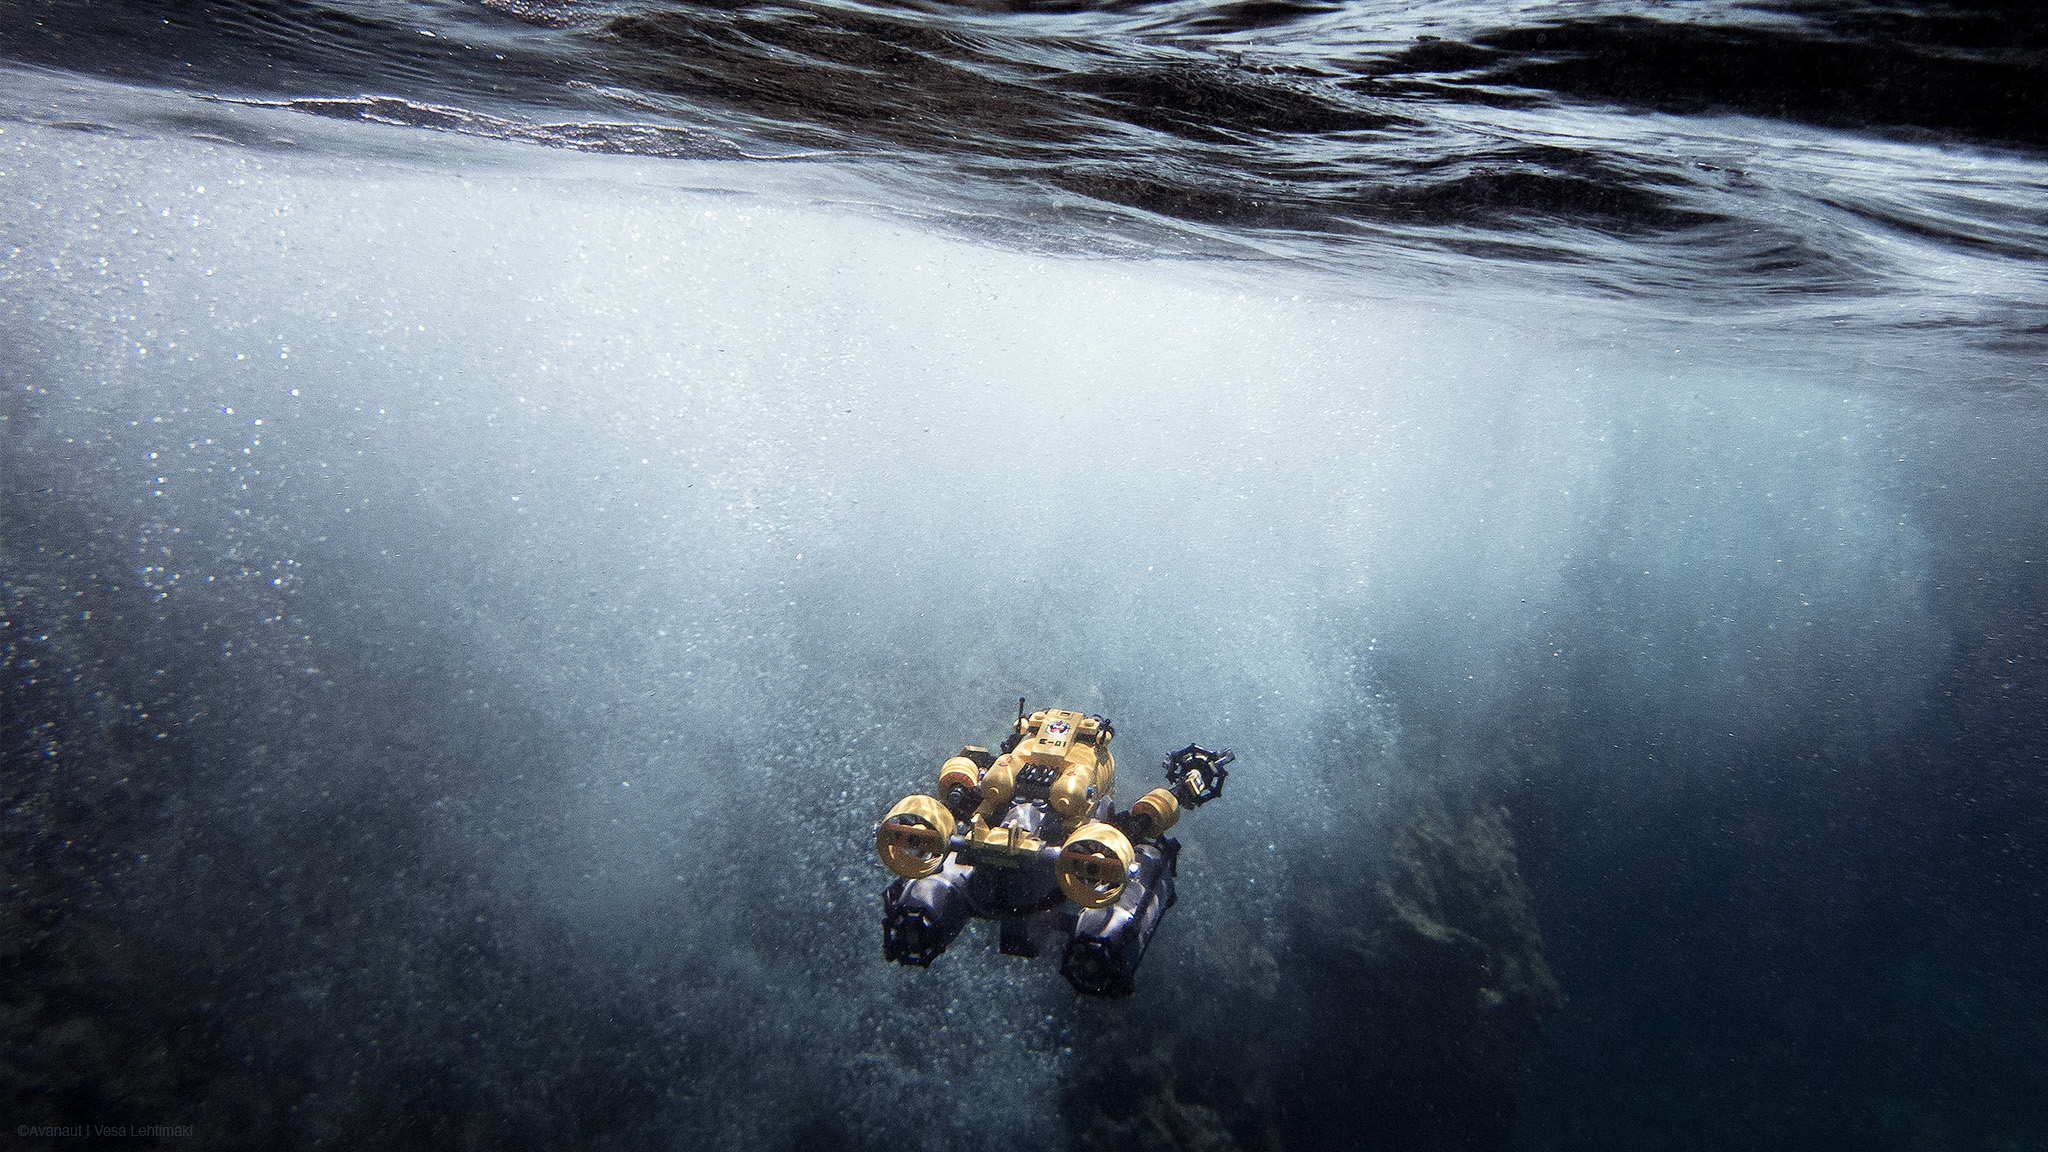
The Ponza session was improvised, I was unprepared, but looking at the images afterwards back home I began thinking there was something in it. I bought the then just released Lego Deep Sea Explorers submarine and tried it in our local waters here in Finland. But, alas, our lakes are nowhere near the clarity of the Mediterranean. The photographs were terrible.
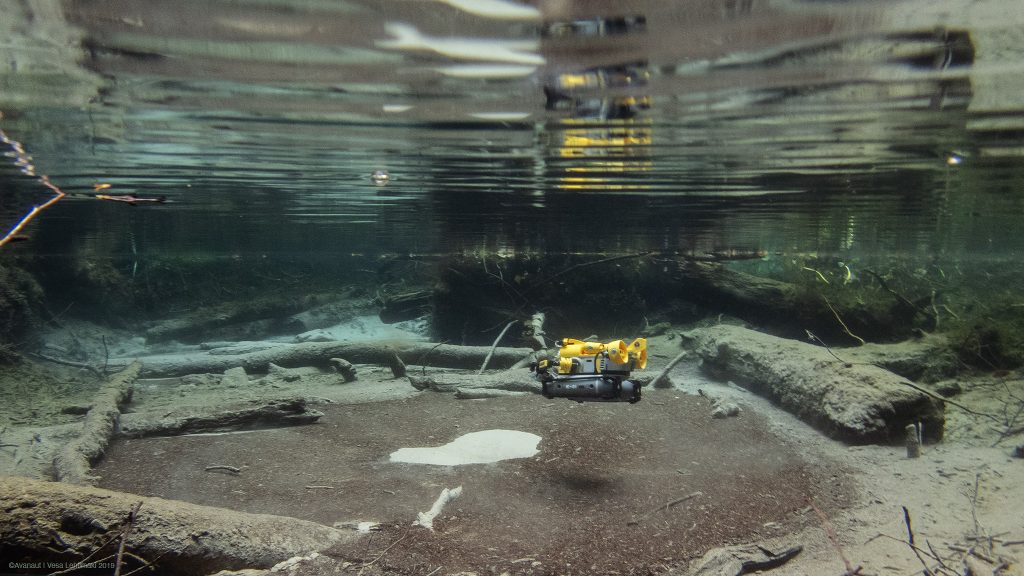
Next year we decided to go to Ponza again but this time to stay for a few days. It's a lovely place and we wanted to have a better look. Thanks to our national airline and their overbooking policy our stay got shortened by a full day. In the end I had two afternoons with the Lego sub and the Action Man. This time the Action Man had an orange wetsuit because the original blue had disintegrated. Same thing happened with the orange one after the trip. It is very unfortunate that soft rubber products these days are like that, self destructing.
Anyway, I was better prepared on this second trip and I got a nice set of photographs. I have posted dozens of them online over the years. I learned a lot of what works and what doesn’t during these couple of days. It was a big leap.
A fun thing happened after we returned home. We watched Wes Anderson’s magnificient The Life Aquatic With Steve Zissou, one of my all time favourite films, and I realised they had used Ponza for some location shoots.

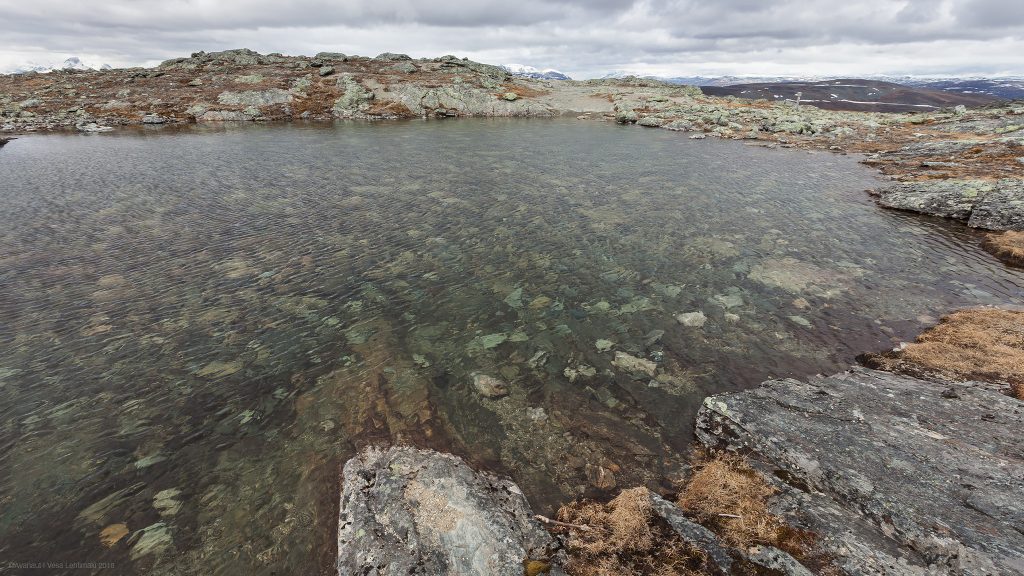
Not willing to fly if not really necessary anymore I have managed to find clear enough waters from Finland too. Unfortunately they are a long drive from where I live, the waters aren't clear enough in the south. The best I’ve found were some arctic meltwater pools in Lapland but it takes more than a day to drive up there. Then again, if you're on the road anyway, perhaps a roadtrip all the way to the Barents Sea, a part of the Arctic Ocean. It is clear and just as exotic as any ocean on Earth. Two days’ drive one direction. I'd like to do this some day.
Looking for potential locations within reach has turned up some interesting spots. Like this underwater freshwater well, Uhrilähde (Sacred Well) in Jämijärvi, three hours’ drive from home.
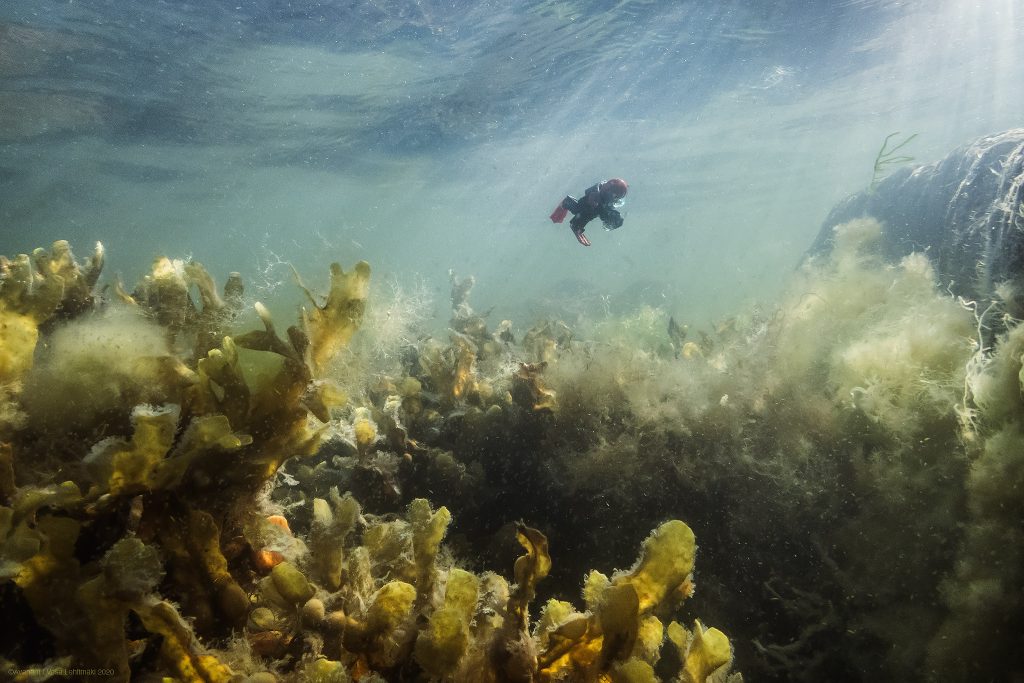
When photographing in various freshwater ponds and brooks, or even the algae prone Baltic Sea, the colours vary a lot. It depends on the weather too, obviously. Mid-day sunshine is different than afternoon underwater, so is an overcast sky. What is around above the water surface matters, even trees, buildings and rocks. I like that.
The TG-4 really is an excellent camera for its size, the TG series are the best underwater cameras in their class, say some reviews. It's quite telling that Olympus with their latest version TG-7 hasn’t been able to improve it terribly much. It’s obviously better but not radically so. The water seals on my TG-4 still work after 9 years of active use, it’s shockproof, offers RAW and has a surprisingly good macro. I've photographed closeups of spiders with it.
I am looking at alternatives to the old TG-4 however. It’s a nice camera but I could use something with a sensor that is more forgiving. Especially if I’m going to spend days traveling to a location again.
Photographing toys underwater in real environment is a fun idea all in all, I think.