The “Red Jammer” is, as many of you know, the one Y-wing starfighter that never made it to the silver screen, Star Wars (1977). It was the first Y-wing model built, not counting the Colin Cantwell prototype, and is the one the other models were based on. It has slightly different surface detail than the ones used for filming the attack on the Death Star in Star Wars and it was not fully finished on the starboard side. The Jammer was sent from California to London as a reference for the full size studio mock-up used in the Yavin IV hangar scenes.
Sometime in 2012 Nice-N Model Designs released a big 1:24 scale Red Jammer Y-wing model kit. It was an incredible kit, a real gem, and I missed the window to order one! The sell happened at a time I was just only realising these things existed in the first place, big “Studio Scale” resin kits, made in incredibly small numbers. It turned out these were rare as hen’s teeth.
The studio scale concept is often misunderstood to mean 1:24 scale in particular but it actually has nothing to do with scale. Studio scale is a replication of a screen used model, whatever the scale is. It is sometimes also said to mean not just the correct size but also the exact same parts and paint job. Studio scale means a replication of an original screen used model as accurately as possible.
I wanted to have a 1:24 scale Y-wing no matter what. I found an unbuilt kit in Belgium in March 2014 after a two year search. The entire production run of this kit was 44 numbered units with perhaps a few unlisted extras made. Mine is number 40 of 44. I believe there was an earlier release with some differences in how the kit was designed. There were also some made later, not the Red Jammer but I think Gold Leader. Or at least there was supposed to be more, I'm not really sure if of this. Nice-N Model Designs website suggests they are not active anymore.
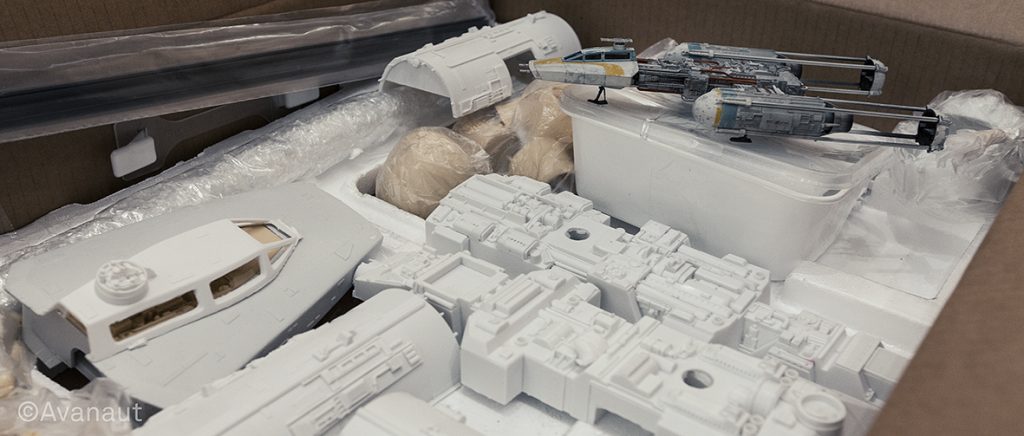
Opening the box with the huge Y-wing kit parts inside was probably the most thrilling and profound moment I’ve ever experienced with scale models. This was a dream come true. It was not just the two year wait but the wait from 1977 fulfilled all at once.
My kit was the Red Jammer, the different one. I was only learning the differences between the individual Y-wing models and it turned out I wanted to have something that looked more like the ones we see in the film. I wanted something from them all, not one particular model – and made with genuine parts! There was some serious research ahead of me.
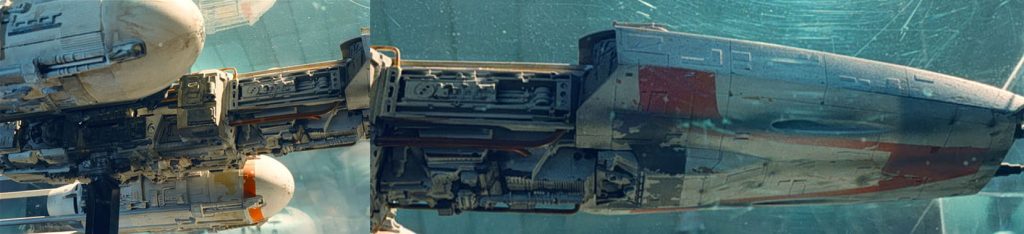
Ten years ago finding information on these models was very different than it is today. I happened to stumble my way into this peculiar niche of model building at a time when there still were some unidentified parts on the models and the data was not exactly public yet. You see, those bits and bobs on the original Y-wing filming models were resourced from vintage model kits, tanks, trains, battleships and whatnot back in 1976. All those parts were researched and identified in the past ten, fifteen years or so, when the Y-wings were reverse engineered by a group of enthusiasts. They went through hundreds and hundreds of old pre-1976 scale model kits in search for these parts, it is an astonishing achievement.
Photographs of the Gold Leader and the Red Jammer existed but they, along with information of parts and the particular vintage model donor kits, were not available to an inexperienced newbie from Finland just like that. It was frustrating at times even though I understand why the secrecy. Gradually the veils opened though and I got access to some high resolution photographs. I bought about a dozen of the vintage model kits for the correct parts, sourced some individual parts through various contacts, some from Australia, Japan etc, and learned to make silicon casts and resin copies of certain parts.
Then the Gold 2 a.k.a. “Tiger Sprocket” surfaced in 2016. It’s the screen used model that was given to Alan Ladd, the producer who greenlighted Star Wars. It was now in possession of Stephen Lane, the founder of Prop Store, an auction house specializing in screen used film props. Lane generously sent me some high resolution photographs of this beautifully survived Y-wing model. This was a superb resource.

Today you can find really good images of all of the filming models. With a little research you’ll find kit lists and part maps from builders’ forums. And let’s not forget the incomparable Star Wars: Chronicles, the Japanese book with great photographs of all the models. Unfortunately it is very expensive these days.
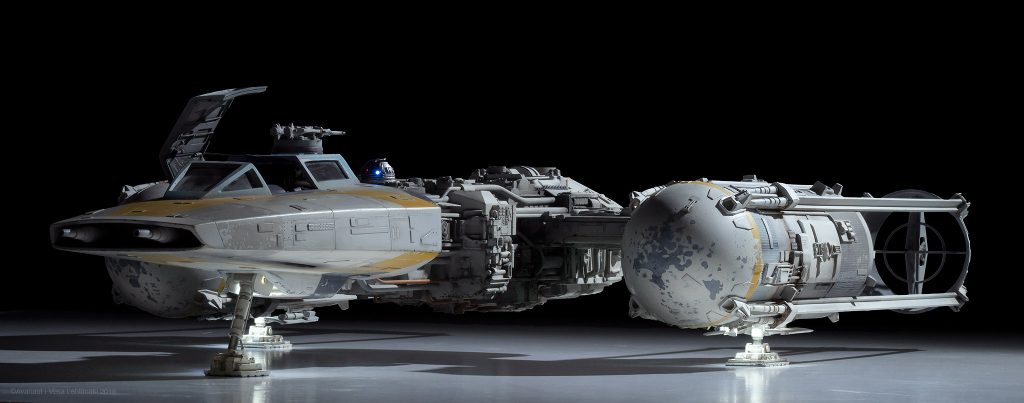
The research and altering the model with genuine vintage parts was time consuming. To add to the ambitious build I wanted to have the model light up for photographs. There are lights in the engines, cockpit dashboard and the astromech droid. On top of that I made removable landing gears from scratch with lights in the gear wells. I also wanted the cockpit hatch to open and close. This all took me to a rabbit hole unlike I have ever experienced before or since.

I knew I was out of my league with this model, it was my first resin model after all. At one point I put the Y-wing on hold and purchased a Salzo V3 X-wing (a remarkable kit as well) to learn about resin and big scale so that I wouldn’t mess this up. I finished the X-wing before proceeding with the Y-wing with the newly acquired skills.
The painting phase was incredibly unnerving, I procrastinated around it for months. The originals are gorgeous, their look, achieved with delicate layers of mist coats, is very difficult to replicate. I knew I couldn’t do it. My Y-wing is an amalgamation of all the Y-wings, it couldn’t be painted as any one of them anyway. I needed it to be a “Gold X”. I used the then newly released Archive-X enamel paints. The Archive-X product line is a remarkable resource for anyone building old Star Wars models. They have only acrylics available today.
So, the colours were right even if the paint scheme was going to be my own. I was so nervous that I wouldn’t succeed in painting the model quite like I had hoped. And sure enough, I made mistakes and the layers of paint grew thickness and developed grain. It was not as good as it could have been. The paint looks nice from afar but in close inspection it leaves room for improvement in some areas. I have planned to partially repaint the model, just the head and the engine nacelles, to give it some of the qualities I feel it’s lacking. Maybe some day.
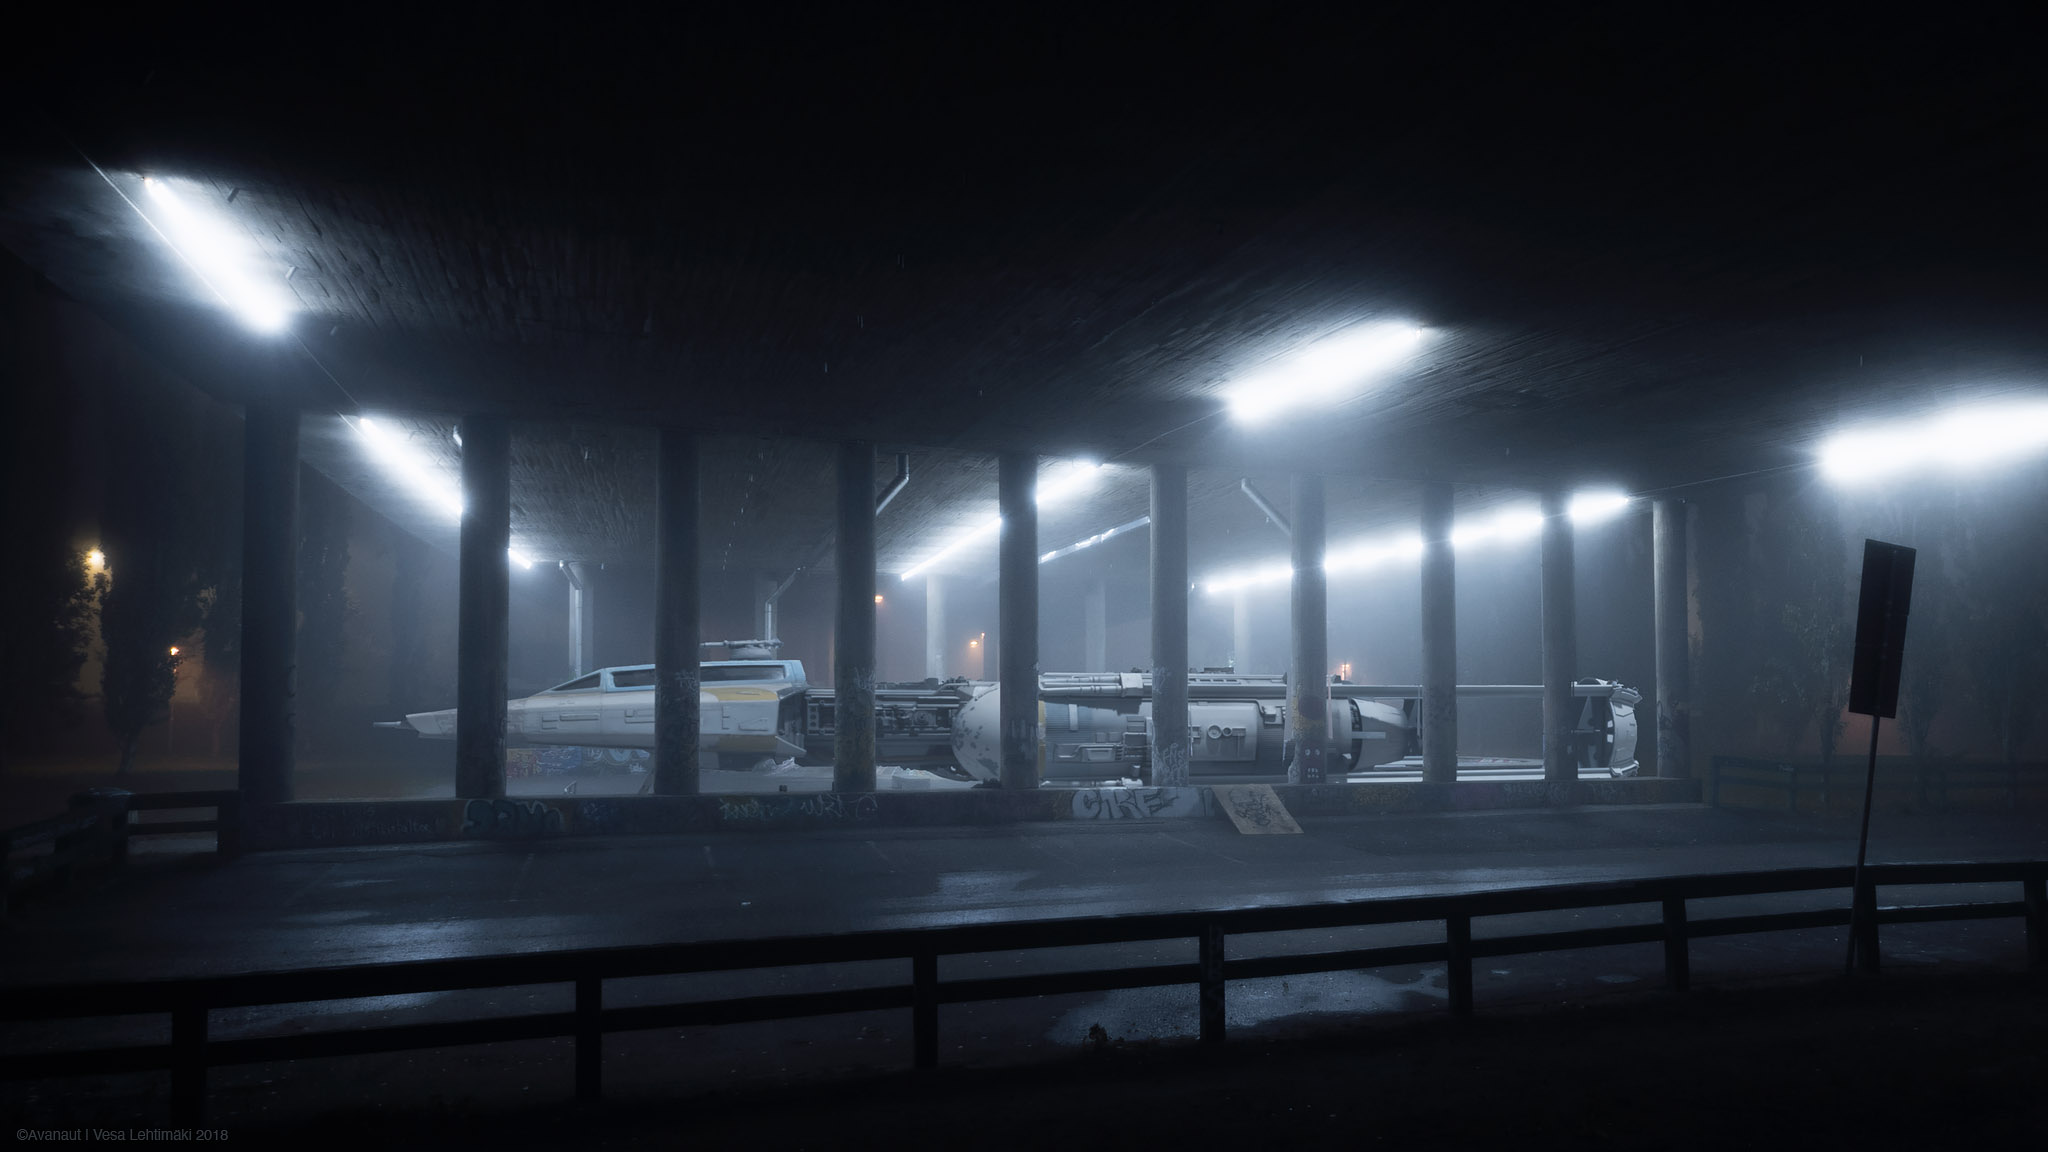
The irony is that I love the big and beautiful Y-wing model despite the shortcomings with the paint, It looks amazing to the naked eye, I just don’t seem to like photographing it very much. That was the real surprise with this model, I have taken just a few photographs of it.
For this blog post I decided to take some studio photographs of the model as it is. I realised I had not really done even that before.


The thing is that my Y-wing is a relic of a bygone era. I built it the old fashioned way while watching 3D printing evolve from the crude early Shapeways products to what it is today; a new medium with affordable home printers with quality indistinguishable form plastic injection mold items. There will be those who still do this by hand but many have already moved to printing. Especially those who think of doing this commercially. While it is sad in some ways, it is also the beginning of a new, glorious era of modelmaking. I hope I have it in me to find a way to make use of it myself.